With the ceiling painted and the left and right walls painted, and the front, we are left with just the back walls to be painted.
First we have to clear off all the stuff hanging from the walls.
With the ceiling painted and the left and right walls painted, and the front, we are left with just the back walls to be painted.
The garage ceiling needed to be redone. It was the old popcorn finish from when the house was built. There had been two minor leaks in the roof that caused the popcorn to fall off in two places. Plus there were 40 years of accumulated changes to the lighting and other changes that had left holes and bad patches in it. We had repainted most of the walls, and redone the sink in the corner. The ceiling was next.
I could take the popcorn off, but once that is done, it needs to be re-textured and I don't have the experience or equipment to do that. So I hired it out. From the whole house repainting, Hernan Diaz of HD Paint & Home Remodeling impressed me, so I called him out for an estimate. He said $1800 and 3 days; could start in about a week. That sounded reasonable, and gave me a week to get things ready.
I moved a lot of the stuff in the garage out onto either the front porch or the back porch -- stuff like ladders and the lawn mower and anything that looked to get in the way if you wanted to work on the ceiling. And I removed the light fixtures.
The biggest problem was the grate that I had installed into the ceiling.
I removed the grate, and trimmed the hole in the sheetrock back an inch or so to expose the bottom of the ceiling joists so that I could attach a new sheet of sheetrock to them.
Anyway, when HD showed up, he first went around and applied plastic to all the walls and floors.
He then used his compressor and spray gun to apply a light spray of water onto the popcorn ceiling, let it dry and then did it again. Doing this a couple of times, the popcorn separated from the sheetrock and fell to the floor when he scraped it off with a wide blade. He did an amazing job of removing the popcorn and leaving a ceiling in great shape.
Of course the garage doors obscure access to the ceiling above them, so they needed to be down/closed when he was working on that part of the ceiling, and the garage door opener and chain and track needed to be covered in plastic, so much of the time they were closed. With the water, and sheetrock work, and later the texture and it drying, there was a lot of water in the air. And the outside temperatures were in the high 90s at least. So it was very hot and humid in the garage, surrounded by plastic, with limited light (I had removed the light fixtures).
Once the ceiling was prepared, a light texture was applied.
The last day was all painting. First a primer coat of Kilz to seal the sheetrock. HD wanted the original, oil-based, Kilz. It took 3 gallons. I bought that at Home Depot ($107.10). Next came 2 coats of the final paint -- Heavy Cream again, is what we are using for ceilings. For this I picked Behr Marquee Interior Satin, 5 gallons. $272.
The result? A beautiful ceiling. Both the front of the garage
Of course, that was just for the painting of the ceiling, I still had to restore the garage to working order. The main part of that was the lights. I replaced the three lights with new light fixtures -- LED strips, from Home Depot. The two over the cars are from Lithonia Lighting, MNSS 4 ft. 120-Watt Equivalent Integrated LED White Strip Light Fixture 4000K High Output, Model # MNSS L48 7000LM MVOLT GZ10 40K. These put out a lot of light -- 7000 Lumens. Each. About twice as much light as the previous lights. 2 at $54.97 = $109.94.
Installing them was a bit of a trick. From the package, I first removed the plastic cover and then the metal piece holding the lights. That piece was attached to the back by a grounding wire and the wires to the LED driver (looks like a small transformer). Both of these were removed by removing a screw each. Separating the top from the bottom. That makes it fairly easy to install the bottom onto the ceiling, with the light power supply wires coming thru a knock-out hole.
And then the top can be snapped back onto the bottom; careful not to pinch any of the wires. And the top plastic cover can be put back over the LED strip to produce the installed light.
Back over the workshop area, we do the same but use a slightly lower output fixture. It looks exactly the same but is only 5500 lumens. Model # MNSS L48 5500LM MVOLT GZ10 40K. $49.97.
We want to move the WiFi router to be closer to the middle of the house, It seems like the easiest thng to do would be to put it where the phone used to set (back when we had a landline) on the counter between the kitchen and the living room. The WiFi router takes a (short) ethernet cable from the cable modem. So we need to move the cable modem.
To move the cable modem, we need a cable drop in the new home for the cable modem. We already have a telephone jack in the wall of the kitchen next to the counter, and without a telephone, we really don't need it, but that would show us where to drop the cable down into the kitchen.
We find a new wall plate that has a cable connection, and a cat5 and an empty square hole in it, and figure, as long as we have everything open, rather than replacing the phone line wiring, we'll just add the cable, and a cat5 connection.
Which means we need a connection for a phone line to the wall plate. So off to Home Depot to get a Voice Grade Jack from Commerial Electric (1000 023 234). The instructions (online) show how to wire it for a normal phone line (cat3).
We already have some spare cat5 cable (the yellow cable in the picture above), so we run all those down into the kitchen wall, and out and into the electrical box. The hard part is conneting all three to the back of the wall plate and putting it all back into the wall.
Some of the windows are in the middle of solid stone block walls. To do this, they put a metal plate from the stone wall on the right to the stone wall on the left, and then put the stone blocks that go above the window on top of that metal plate. For example here is the exterior view of the small window in the master bathroom.
The plates were painted, at some point, to try to match the color of the stone -- an off-white. But the paint is weathered and peeling. For example, here the small double-hung window in the loft.
There are 3 colors that might be reasonable for these bars -- trying to match the stone, trying to match the trim around the window, or trying to match the wood trim of the house (which we just had re-stained and is Behr Chocolate SC-129). We used a photo-editor to select and change the color of the metal plate in the above photo, and Linda selected the Chocolate color to match the house trim. So off to Home Depot to get a quart of that. $37.76, including masking tape and plastic film.
Each of the plates is at most 4 inches deep, and the window lengths are 24 inches for the small windows and 30 inches (times two) for the larger windows. With 4 of the small windows and 4 of the larger double windows, we get a total of 36 lineal feet or 12 square feet that need to be painted. A quart should cover about 88 square feet.
The first task is to scrape and clean the metal plates. Then we had to mask off the window and the surrounding stone. That took 2 hours.
There were a few spots where it seemed the underlying white paint from the previous painting was showing thru, so we put a second coat on the center part of the plates (staying away from the edges).
When the painters were here, they pointed out that there were cracks in the extrior walls, mainly where the stone meets the trim.
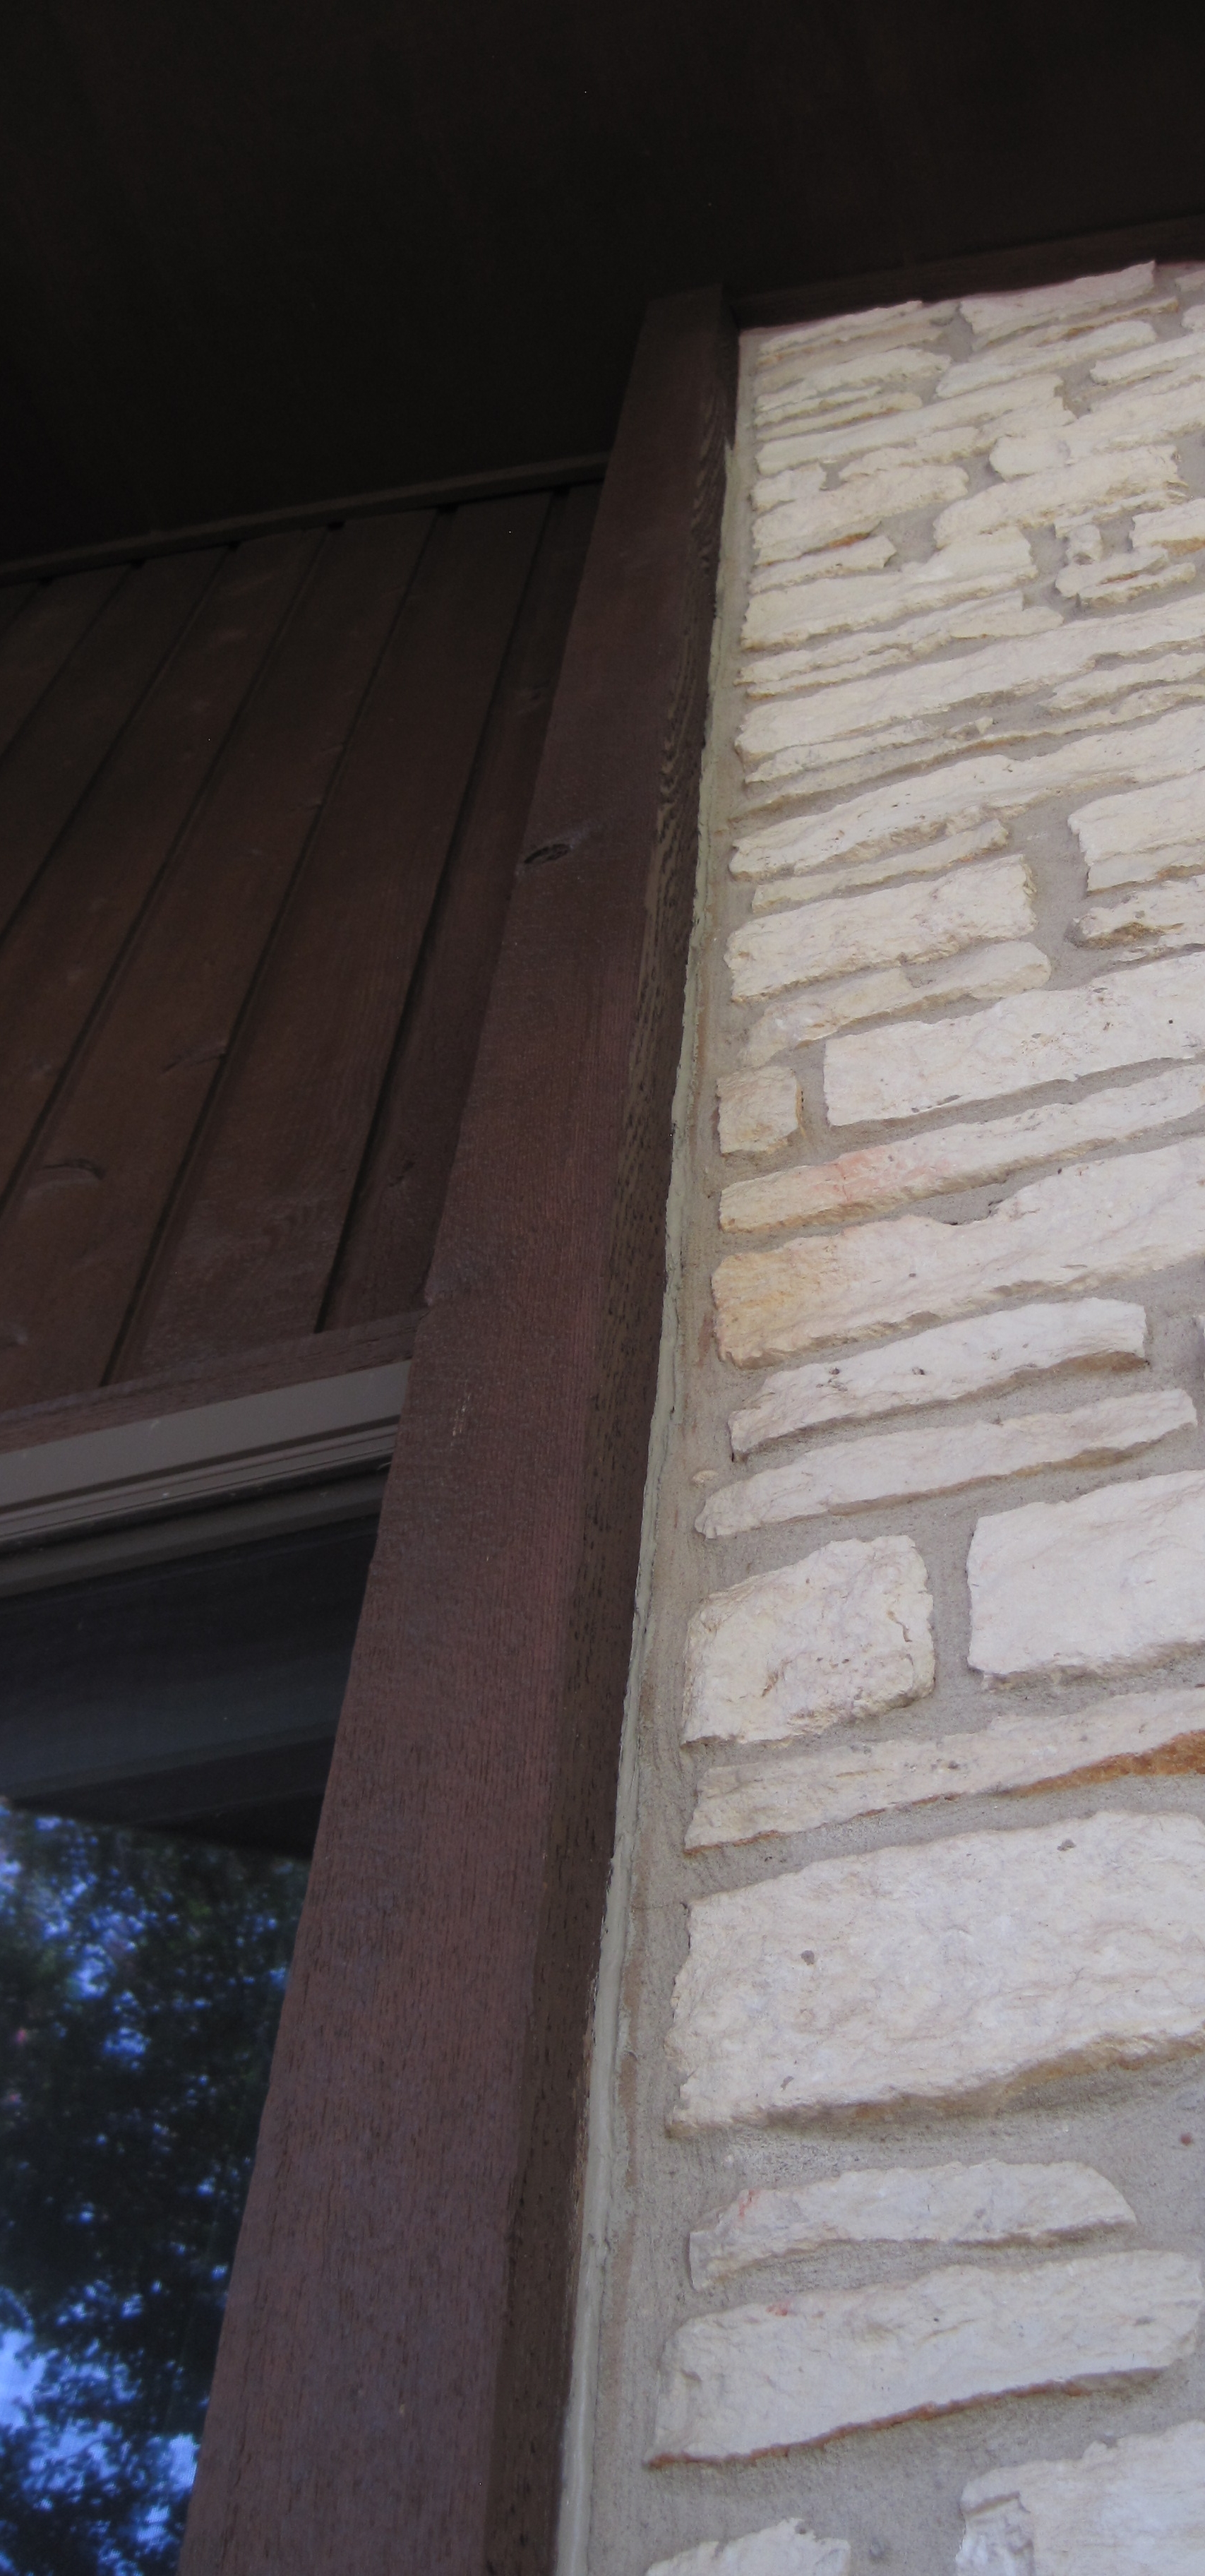
For example, the window in the library out to the front porch, on the exterior, has these two huge beams vertically on each side of the window. There is a large gap between the beam and the stone work.
For this long gap in the front, the main painter supervisor suggested a caulk that is colored to look like mortar. Loctite PL Concrete ($10.80 at Home Depot).
That seems to work pretty well, although you do have to be very careful of where it goes -- it does not clean off well.I used just mortar (and water) on a couple of other places.
Update: 17 July 2025
I also noticed that there were left-over holes that had been drilled in the stone, but were no longer being used. For example, there were 4 holes that had been drilled near the North West faucet, to hold a hose reel, but it must have broken, and been removed, leaving nothing but the holes.
But it does a passable job.
Some of the holes went into the mortar between the limestone stones. In that case, I just filled it in with mortar.
Update: 22 July 2025
In the front of the house, there is a pillar with a large crack in the mortar.
Update: 26 July 2025
We had a wasp problem in two corners of the house. The wasps were going behind the fascia boards at the North and South corners on the West side of the house. We discovered this when we were starting to paint the house, as far back as June 2025. But we worked around it by spraying with a Wasp and Hornet spray. That would kill one or two (out of the 6 or 7) wasps hanging around, and scatter the others, at least for a little while. Within a day, or maybe only hours, they returned. We used 5 cans of the Wasp and Hornet spray, and we still have a problem.
It seemed they must have a nest inside the walls, and were just going to and from it via the joint between the stone facade and the wood fascia board. So the theory was that sealing the joint would prevent them from entering and solve the problem.
We first used a can of the Great Stuff foaming sealer. That did a good job of sealing almost everything, but the wasps hunted around and found small holes that were not completely sealed and contined to go in and out. So we turned to the Loctite PL Cement caulk and used it, over the spray foam, to seal the remaining areas, both the South West corner
While this seems to have stopped the wasps from going into the space behind the stone facade, they are still hanging around both corners, presumably confused by the disappearance of their entry ways, but not having anywhere else to go. We assume that over time the problem will go away.
The Air Conditioner was installed in November 2020, so this is it's 5th cooling season.
In February, the whole system just stopped. At that point it was heating, but it stopped and the thermostat displayed an error code that suggested the system was not configured correctly. I called Service Wizard, and they sent out a technician. He checked the system out and could not find a problem. A power-off/power-on reboot of the system seemed to fix it. $192.
In April, Service Wizard came out out and did a "26 Point AC Maintenance Checklist" and it worked fine. $45.
Then, on 28 June 2025, after the outside of the house was painted, we noticed that evening that the house seemed hot. The temps outside during the day had been in the 90s, but not out of line for the end of June. Looking at the thermostat, it was registering 83 degrees in the house, although it was set for 78.
The thermostat was also flashing two error codes: 177.04 and 184.08. These basically mean that the compressor had determined that the hot coolant from inside the house was not cooling down as it went thru the compressor coils, so it shut it down.
I called Service Wizard, but being late (9:30) on Saturday night, it went straight to voice mail. I left a message.
It was a hot and uncomfortable night. Especially for the dog who couldn't get cool. At about 1:30, he decided outside was cooler than inside and went outside to lie on the grass for an hour.
In the morning, shortly after 9AM, Service Wizards called back and said they could be out here by 11AM. When they arrived, they checked all the normal things, then went outside to check the compressor. Eventually he determined that the compressor coils where dirty, and using a hose, washed them off. Dirt on the coils would prevent them from cooling the coolant.
And that seemed to do it. The system started working again, and in a couple of hours had the house back to normal (about 4 hours to go from 84 down to 78). The technician said I should clean the coils every 3 months or so. He also said that cleaning the coils is part of thier jAC Maintenance Checklist, so they should have been cleaned in April, but we didn't discuss that. $219.
Update: A couple of days later, on 1 July, I took time to go out and clean the compressor more completely. First I turned off power to the unit, using the switch on the wall behind it.
I used a vacuum cleaner to get the leaves out of the bottom of the unit, and then a hose to back-wash the coils to get them clean. Just a normal stream will do fine. Putting it on "Jet" or such to increase the pressure seemed to be too much and threatoned to flatten the heat fins on the coils.
We had the house exterior painted in 1993, 2002, and 2017. It is beginning to show how long it has been, so it seems best to get it repainted. Vivax Pros had stopped by in February, and now were back again. They gave a quote of $5572 to paint the entire outside trim, and agreed to use the stain that I have been using: Behr Premium Semi-Transparent Waterproofing Stain and Sealer (No. 5129) Chocolate.
and then painting. First they brushed around the edges, and then used a spray painter to do the bulk of the work, getting everything painted in one day.
Back in January 2000, we put a big sink in the garage. It was just temporary to see if it was useful. There had been a small sink on the exterior wall. We got a pre-fab cabinet and a big plastic sink, and put it in the corner next to the door to the kitchen. It's worked out well -- seen lots of use. But the wall above the sink keeps getting wet and then dry, and the paint is flaking. Plus the cabinet (cheap press board) is starting to come apart. So it seems time to make it permanent with quality materials.
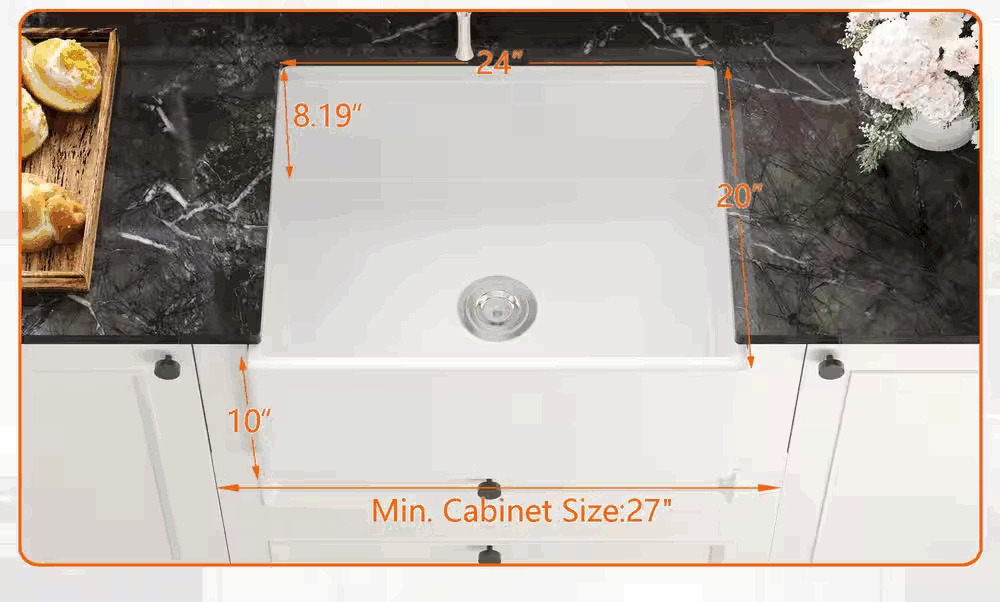
And we also need a new sink. That was more difficult. The old sink was very large, and deep, but plastic. There are few sinks of that size. We finally found a 24 in. Farmhouse Single Bowl White Fireclay Workstation Kitchen Sink made by Deer Valley sold by Home Depot ($306.24).
We figured that rather than running the plumbing from the side wall, thru the cabinet to the sink, we would actually move it into the wall between the kitchen and the garage, since we would be rebuilding that wall anyway for the tile. So now the entire project is exceeding my skill level -- move the plumbing, rebuild the wall, tile it, new cabinet, new sink, new counter top, and new sink faucet.But I had had a good experience with Joshua Dickson from Meadow View Construction when he came out and did the trim work for the 3rd return air and under the granite countertop in the kitchen, so I discussed it with him and we came to an agreement that he would do the work, for $4,133.
I removed as much of the stuff in way in the garage (the towel rod, the overhead shelf), and emptied the cabinet. Then came demo -- remove the old sink and cabinet and open up the wall for the plumbing.
Once the walls were coverd with hardie board, and it had been properly sealed against water, Josh could start installing the tile.
In the meantime, I drew up a design for the new cabinets, using my best high school drafting skills.
Jaimes Cabinets agreed to make them, for $1400, using solid plywood. They did a great job and I picked them up, brought them home and put two coats of polyurethane on them.
Josh then installed the cabinets and installed the sink in place.
After about two weeks, Toor showed up to install the countertop. It took 4 guys.
Despite the laser measurements, it didn't quite fit the walls, shoving it over too far to the right for where the sink is. As a result, they needed to trim off an edge two or three times to get it to fit. They used a silicone caulk on the wall/countertop joints, and also all along the top of the cabinets. Then they applied more to the counter top/sink joint.
Before they caulked everything down, I drilled a 2 inch diameter hole in the shelf under the sink, behind the sink, below where the hole for the faucet was drilled. That allowed me to put the new faucet (Delta Classic Model 19810-SS-DST) in place. Unfortunately all the tubing underneat the sink (the hot and cold water lines, plus the hose for the spray) did not reach down below the sink, so I had to enlarge the hole in the shelf, in order to get my hands up into the space behind the sink, and get things installed. The faucet itself had to be bolted down to the counter top.
Then the hot and cold water lines were attached to the cut-off valves that Josh installed. Finally the spray hose had to be attached, with a weight on the hose, to allow gravity to pull the spray head back into position after it is used. All this while lying on my back with my hands in the hole behind the sink working in the dark.
This is a workstation version of the sink, so it came with various extras -- a cutting board and mesh flooring, I'm not sure how those will end up being used, but it gives it a touch of class.
While getting things put together, I noticed that the grout didn't fully cover the space around the light switch.
That required getting some more grout (Egg-shell white), and carefully filling in the missing spots.