Wednesday, June 27, 2012

Dirt for the South Bed

We put down a final layer of really nice dirt on top of the South Bed. We ordered 5 cubic yards of Growers Mix delivered from Austin Landscape Supplies. $265.21 at $35 a cubic yard plus $70 for delivery.


We covered the South Bed, both left and right, with about 2 to 4 inches of this dirt, trying to create a nice smooth finished bed.


There was dirt left over -- we probably only needed 3 cubic yards for the bed itself, but we will be able to use this for the next excavation area.

Sunday, June 24, 2012

Finishing the South Bed Irrigation

American Irrigation Repair came out and repaired the two broken sprinkler valves. The valve for Zone 4 had a broken solenoid; the valve for Zone 3 had a bad diaphragm, and had to be completely replaced.

The controllers for Zone 2 and Zone 3 are about 35 inches from the house foundation for the breakfast nook bay window. They cover from 20 to 35 inches from the South corner of the breakfast nook bay window. The supply line is 27 to 28 inches from the house foundation, and 2 to 6 inches underground.

The controller for Zone 4 is 23 to 29 inches from the sidewalk and about 12 inches underground.


The drip irrigation lines are meant to be about 6 inches down and 18 inches apart. I tested them before they were buried and they worked fine. In 110 minutes, Zone 3 used 700 gallons of water. That would be both the North Bed and the extended South Bed. The ground is still very aerated and loose, so the water does not seem to stay around. After it compresses and compacts more, it should work better.


One problem was noted. We bought a roll of 250 feet of the dripline for the first work, and used it all in the herb beds around the porch (Zone 5), the North Bed, and the right side (West) of the South Bed. Then we had to get more dripline. But they no longer carry the 250 foot rolls; I got 500 feet instead and used it for the left side (East) of the South Bed.

The original roll of dripline that I bought was XFS0912250; this new dripline was XFS0612500. This is the XFS subsurface dripline. The next two digits are the number of gallons per hour -- .9 gallons per hour for the old roll, and .6 gallons per hour for the new roll. The 12 is then number of inches between drip holes, and the last is the length of the roll (250 feet for the old roll and 500 feet in the new roll).

The problem is that this means the left side (West) of the South Pit has mostly 0.9 gallons per hour and the right side (East) has 0.6 gallons per hour. Visually it looked more like the East side was dripping more, but it should be only 2/3 the rate of the West side. We will have to see if this is (or is not) a problem.

Thursday, June 21, 2012

Irrigation for the South Bed

Once all the rock from the Extended South Pit was removed, we could fill it back up with dirt.

This took all the dirt that we had been stockpiling in the backyard. Three full days of nothing but moving dirt from the pile in the backyard and dumping it into the pit. 

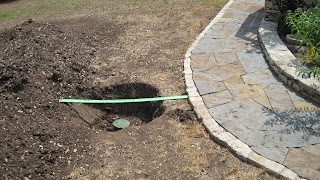
We next needed to re-install irrigation in this bed. As with the North Bed, we are planning to use underground drip irrigation. Back in November, we ran a supply line from the controller for Zone 3 to both the North and South beds. The first problem was to find that supply line. Not being smart enough to mark where it was exactly, we approximated and dug.

Nothing. Luckily we hit solid rock at 22 inches down, so we didn't keep digging in the wrong spot. To get a better idea, we looked at the one photo that we had of the supply line to the South bed, and used a hose to try to recreate the image of the supply line. 


This time, at 20 inches down, we found the supply line.

It was a bit longer than necessary, so we cut it off, and put a box over it. 

We attached a cut-off valve, and then the filter, and 30-pound pressure regulator needed for underground drip irrigation.

We laid out a plan of how to put in the drip irrigation lines. The greenhouse effectively splits the South bed into a left and right (or East and West) sides. For each of these we need to give special attention to the trees. 

We had to go back out in the dirt that we had just put in the pit, and trench it to about 4 to 6 inches deep. Our plan was to put the drip irrigation lines at 4 inches down, and then add an additional 2 inches of good dirt over the top. We trenched both the left and right (and front and back) of the greenhouse, and installed our drip irrigation lines.

The supply line is 1/2 inch PVC. The drip lines connect directly to these two lines -- one left and one right. We have a collection line at the other end which leads to a flush valve. In this case, we have 3 flush valves -- one in each corner and one in the middle for the right side (West) PVC supply line. For the North bed, the collection line was another 1/2 PVC. But for the South Bed, we decided to use the drip line itself. This should provide somewhat more drip area. 

Unfortunately, it seems that the valve controlling Zone 3 is not working correctly -- we can't get any real water out of it, not even enough to flush the lines. So tomorrow we have arranged for American Irrigation Repair to come out and replace the valve for Zone 3. Also the valve for Zone 4 that seems to have stopped working last year. Then we will be able to flush the lines, test how well the drip works, and then bury everything. 

The parts for the drip irrigation, including the low-flow regulator, filter, dripline, and all the connectors was $252.71to John Deere Landscapes plus $16.83 to Lowe's (for the connector box) and $73.84 to Home Depot (for the PVC parts).

Wednesday, June 6, 2012

Finishing the Excavation of the South Bed

Having the cement wall and limestone block wall under the fence to define one side of this bed, we turn our attention to finishing the excavation. There is a clear layer of rock, about a foot thick which can be removed.


Starting at the low spot, we first start removing the rock along the side of the greenhouse, moving North.


We break the rock up between the olive tree and the greenhouse and haul it off


And then continue around the olive tree up to the stone wall.


breaking the rock into as pieces as large as we can manage


and clearing it out, to create a lower floor for this pit. We are about 4 feet down at the stone wall.

Once that section has been excavated, we then turn back and do the same to the section along the fence.


The utility trench forms one side of the area we want to excavate -- up to the olive tree. Again, we break up the rock.


Again, we haul all this rock off, putting it out on the driveway, to empty out the South Pit.


With all this rock gone, we can now start filling this pit back up with dirt. We bring back the dirt that we dug out, mixing it with leaves and grass to improve the quality of the dirt. We want good drainage around the olive tree and good soil.

Should the olive tree not make it, we will want to dig down and take out the last layer of rock that is immediately under it. We don't want to try to remove the rock from directly under the tree at this point.