Monday, June 3, 2024

French Drain stops working

 The French drain was put in back in 2003 and has been working fine since then.  It was extended and terminated into the blue rock pool in 2008, and then the front end was rebuilt when we built the retaining wall in the front yard.  We exposed parts of it when we moved the gas line, and when we dug out the stumps of the two elm trees.

But when we got the roof replaced in 2023 and new gutters installed, it seemed to stop working.  Heavy rains would cause the downspout in the front West corner to overflow and erode away the dirt around where the downspout went underground to enter the French drain.


The first step to fixing this is to expose the end of the French drain in the blue rock pool in the backyard, between the Bamboo Grove and Zone 7.

The pipes in the French drain should terminate at the rock wall, under the rock.  So first we remove the blue rocks.

That exposes a badly weathered landscape cloth.  Removing that we find a layer of limestone rock.


Removing that, we get down to the actual pipes. 


The center one, sticking out the most, is the main pipe that should go all the way back to the downspout.  The other two, one on the left and one on the right should be perferated drain lines that run parallel to the main pipe, just to drain more.  The main pipe is 39 inches from the fence, and down 16 inches from the top of the rock wall between Zone 7 and the blue rock pool.

We can test for a problem by putting a house in the downspout and turning on the water.  After a long enough time, the downspout is full of water, but nothing is coming out of the pipes in the blue rock pool.

If we put a hose up the pipe from the blue rock pool, we get about 30 feet up the pipe before hitting something that keeps us from going further up.  But we do manage to flush out a dark material we believe is decomposing leaves and the protective granules from the asphalt roofing.

In trying to understand the French drain, we notice old pictures of it showed a clean-out pipe which would now be under, or in, the Rive of Rocks, and digging just a little, we find that.

Pushing the hose down from this clean-out pipe into the French drain, we only get about 9 or 10 feet before it stops.

But the French drain is not just a straight pipe.  It was imagined originally as going along the fence, and only later brought over to attach to the downspout.  So it goes from the clean-out pipe back under the fence gate and then turns right to the fence.  There it turns left and follows the fence down until the fence turns left again and follows the fence to the blue rock pool.  So there are 3 turns.  I think those were 30 degree turns, but possibly 45 degrees, or a mix of the two.  Those turns may be what is stopping the hose.

We tried a Large Drain Bladder from Home Depot ($21.97).  That is a balloon type device that you hook to a garden hose and then stick into your clogged drain.  The water pressure causes the bladder to expand until it seals the drain and then water shoots out the end at high pressure washing away any clog and debris.  Putting it in at the clean-out should then push all the roof granules and decomposed leaves out the other end into the blue rock pool.

That didn't do anything either.  After running the water for about 10 minutes, there was some seepage from the pipes at the blue rock pool.

So we called a Radiant Plumbing to clean out the line.  They could come out two days later.  Matt showed up and after inspecting things offered three solutions: (1) a water blaster for $740, (2) a rotating cable for more, or (3) both the water blaster and the rotating cable for $1074.82.  We went for the least expensive -- the water blaster.

That was similar to what I had done, but with better equipment.  The water blaster put out much higher pressure out the front to break up any clogs, and also put water out the back to (a) move the head forward into the pipe all by itself, and (b) to push anything that was loosened up back out the pipe.  We tried it from the clean-out pipe


and from the blue rock pool back up the pipe.

And then back to the clean-out pipe again.  But we were getting nothing.  Well, almost nothing.  There were small artifacts of PVC pipe and some small pieces of shingle that had worked there way into the drain, but unless there were more, bigger, pieces that didn't really tell us anything.

 So we decided to try the cable snake to see if that would clear things out.


It seemed to get a bit further, but it was hitting something solid and could not get all the way thru the drain.

But we were able to get some flow.  Putting water in at the clean-out pipe would cause water to come out at the blue rock pool, but out of the wrong pipe!  It seemed to come out of the left pipe, not the center one.  Which made no real sense.

Since we had some flow (although we did not understand why), we had done as much as it seemed we could.  The cable hitting something hard was puzzling too.  So the suggestion was to bring a drain camera out and put it down the clean-out pipe.  The drain camera would give us a good view of what was in the French drain, and that would tell us what was needed next.


Wednesday, May 29, 2024

House Numbers on the Curb

 The house numbers that we painted on the curb are showing their age.  So we decided to repaint them.   I scraped the old surface to get off any loose paint.  Then I spray painted the rectangle underneath the numbers to white.  Stencils were used to spray paint the numbers on black.

But the curb curves, and the stencils don't so there was a lot of over/under spray and the numbers looked fuzzy.  I tried to sharpen things up with a little paint brush and paint from the spray cans, but spray can paint is very thin and runny.  When I put paint to the curb with the brush, it tended to run down the curb, thru the numbers.

So I decided we needed actual paint.  In a can.  Oil-based enamel outdoor paint.  Bought one quart can of white, one of black, from Home Depot.  Using another brush I touched up the number I had sprayed.  Took two days -- one to touch up the white, then another to touch up the black, then another to touch up the white that had drips of black, and another to touch up the black that had drips of white.


 To save trouble with the other number on the other side of the driveway, I just went straight to the touching up with the can paint, since I could still see where the number was from the last time.


 And while I was at it, I did the same for the neighbors at 10603.


Friday, May 24, 2024

Sealing the Shower Floor

 We really like the newly remodeled master bathroom. Especially the shower.


However, after about a month of use, Linda noticed small black spots on the shower floor.


We think this is mold.

So two questions: (1) How to get rid of it? and (2) How to prevent it?

To get rid of it, I would normally spray it with a mold/mildew remover, which is basically bleach, but the internet says not to do that because (a) the tile is marble, (b) Marble is calium carbonate -- a form of limestone, (c) limestone is base and bleach is acidic, (d) bleach will eat away at the marble.  Instead I found a recipe for a cleaner for marble composed of:

  • 1.5 cups of water
  • 1 teaspoon dish soap
  • 3 tablespoons Rubbing Alcohol

I mixed that up in a spray bottle, then sprayed it on the tile and scrubbed it with a scrub brush. 

Once that was dry, we decided to seal the stone, to try to keep the mold out of it.  Marble is porous.  We decided to use BulletProof Sealer by StoneTech.

The hope is that this will seal the stone, and not allow the mold to get into it.

In addition, we are looking into using a UVC light to kill any mold.  A UVC light  (254 nm) is supposed to break down any DNA molecules and so kill the mold.  It is also damaging to people, so we will need to be careful.


Friday, April 19, 2024

Replacing all the old utilitarian light fixtures

 Most of the real rooms in the house -- the kitchen, dining room, living room, library, bedrooms and bathrooms -- have major light fixtures selected for that room.  But there are a bunch of smaller rooms -- closets, pantry, hallways -- that just need light, but don't really need anything fancy.  

One of these sorts of simple utilitarian lights are the lights over the toilets.  The bathrooms all have their own major lights, and then there is a single solitary light in the ceiling over the toilets.  All these simple utilitarian lights were the same.


The remodeling of the two bathrooms removed those lights and replaced them with a more modern light fixture.

The old style light was a brass finish, but Linda prefers "Brushed Nickel" and so we are gradually moving the old brass things over to being brushed nickel.  She found this light at Home Depot as a "9 in. 2-Light Pewter Ceiling Light Flush Mount" for $18.36 each.  We counted 11 of them in the house, and figured if we were replacing 2, we should replace them all.  So 11 fixtures for a total of $218.62, including tax.  

The old fixtures required one light bulb; the new ones require two.  Plus, when we went to replace them, we found most of the bulbs were CFLs, so we should upgrade to LED bulbs -- 22 of them.

The replacement process is fairly straightforward, as long as there are no surprises.  First

turn the light on.  Then find the circuit that this light is on, and turn off the circuit braker.  The light should now be off.  Remove the glass globe and the light bulb.


This will expose two screens on either side of where the light bulb screws in.  Backing these out allows the light fixture to be twisted slightly and it comes off.

There should be two wires going to the fixture -- a black (power) wire and a white (ground) wire -- attached by wire nuts.  Remove the wire nuts, and the fixture separates from the wiring, leaving the two long screws that held the fixture in place, plus the black and white wires.


The new light fixture has two white wires plus two black wires (one for each light bulb), plus a copper ground wire. 


Wind the three black wires together and the three white wires together.  Then use the wire nuts to secure all the same color wires together.  The ground wire should be connected back to the metal box in the ceiling.  Generally, fishing around in the metal box, I found more ground wires either tied together or attached to the box.  They should be attached to the box.  Take the new ground wire and attach it to the others either by a wire nut or by adding it to the ground wire attached to the box.

Now the new fixture just has to be lifted up so that the two long screws stick thru to the two keyhole slots in it's base. Notice the two holes next to where the light bulbs will go.


The biggest problem is being able to line up the screws, which are already attached to the electrical box in the ceiling, with the keyholes in the new light fixture.  The new light fixture, of course covers and obscures the electrical box and the screws. And the back side of the new fixture is covered with aluminum foil and fiberglass insulation.

The solution is to extend the holes so that they can be lined up with the screws before the fixture is lifted up and covers everything.  I found a simple plastic straw works well for that.  Cut the straw in half, since it doesn't need to be too long, and we need two of them, one for each keyhole.  Put the straw thru the keyhole, from the light bulb side 


and push it thru the insulation and foil, so that it extends out the back of the fixture.

Now you can push the light fixture up to the electrical box.  You can see the straws and the screws to align them, and can pull the straw out as the screw moves into the keyhole from behind.  Then use a screwdriver to tighten the screws to hold the new fixture in place.


Add the light bulbs.


And the new glass globe.


Go turn on the circuit breaker.  Test that the light works.

Now repeat that another 10 times until all eleven old light fixtures have been replaced by the new light fixtures.

Mostly it went pretty well.  The main problem was not having a ground wire attached properly.  The other problem that came up was with the long screws and the electrical boxes.  The new base is larger around than the old base, but it is not as deep.  This means that the long screws have to be screwed in more in order to secure the new base against the ceiling.  Some of the boxes were normal boxes -- 3 to 4 inches deep -- so there was plenty of room to accept the screws going in further.  But a couple were really shallow boxes -- more like just a flat lid than an actual box, and trying to screw the screws in further meant it hit the back of the box and would not go any further.  These then had to be substantially modified by drilliing a hole that would accept the screws going in further.  That process could take hours.


Sunday, April 14, 2024

Light Switches for the Remodelled Bathrooms

The light switches for the two remodelled bathrooms needed to be changed.  I wanted an illuminated switch for the main bathroom light for all the bathrooms, and to change the normal toggle switch to a rocker switch.

For the central bathroom, the current switch was a single toggle switch by the door.


 so we took it out, and put in an illuminated rocker switch.


The illumination is very faint but shows up at night on the top half of the switch.


For the Master Bathroom, the switch for the bathroom lights is part of two switches, one for the bathroom, and the other (a 3-way switch) for the bedroom.

We remove the first switch (on the left) for the bathroom with an illuminated rocker switch, and replace the second switch with a 3-way rocker switch.


We needed the two illuminated switches, plus the 3-way switch, plus the new switch plate to cover them up.  $29.17 at Home Depot.


Thursday, April 11, 2024

Sink Faucet Fixtures Installed in Remodelled Bathrooms

 The faucet fixures and plumbing was done for the remodeled bathrooms.   All the new fixtures are the same, Devonshire Faucets from Kohler. Model K-394-4-BN.

In the center bathroom, we only have the one sink.

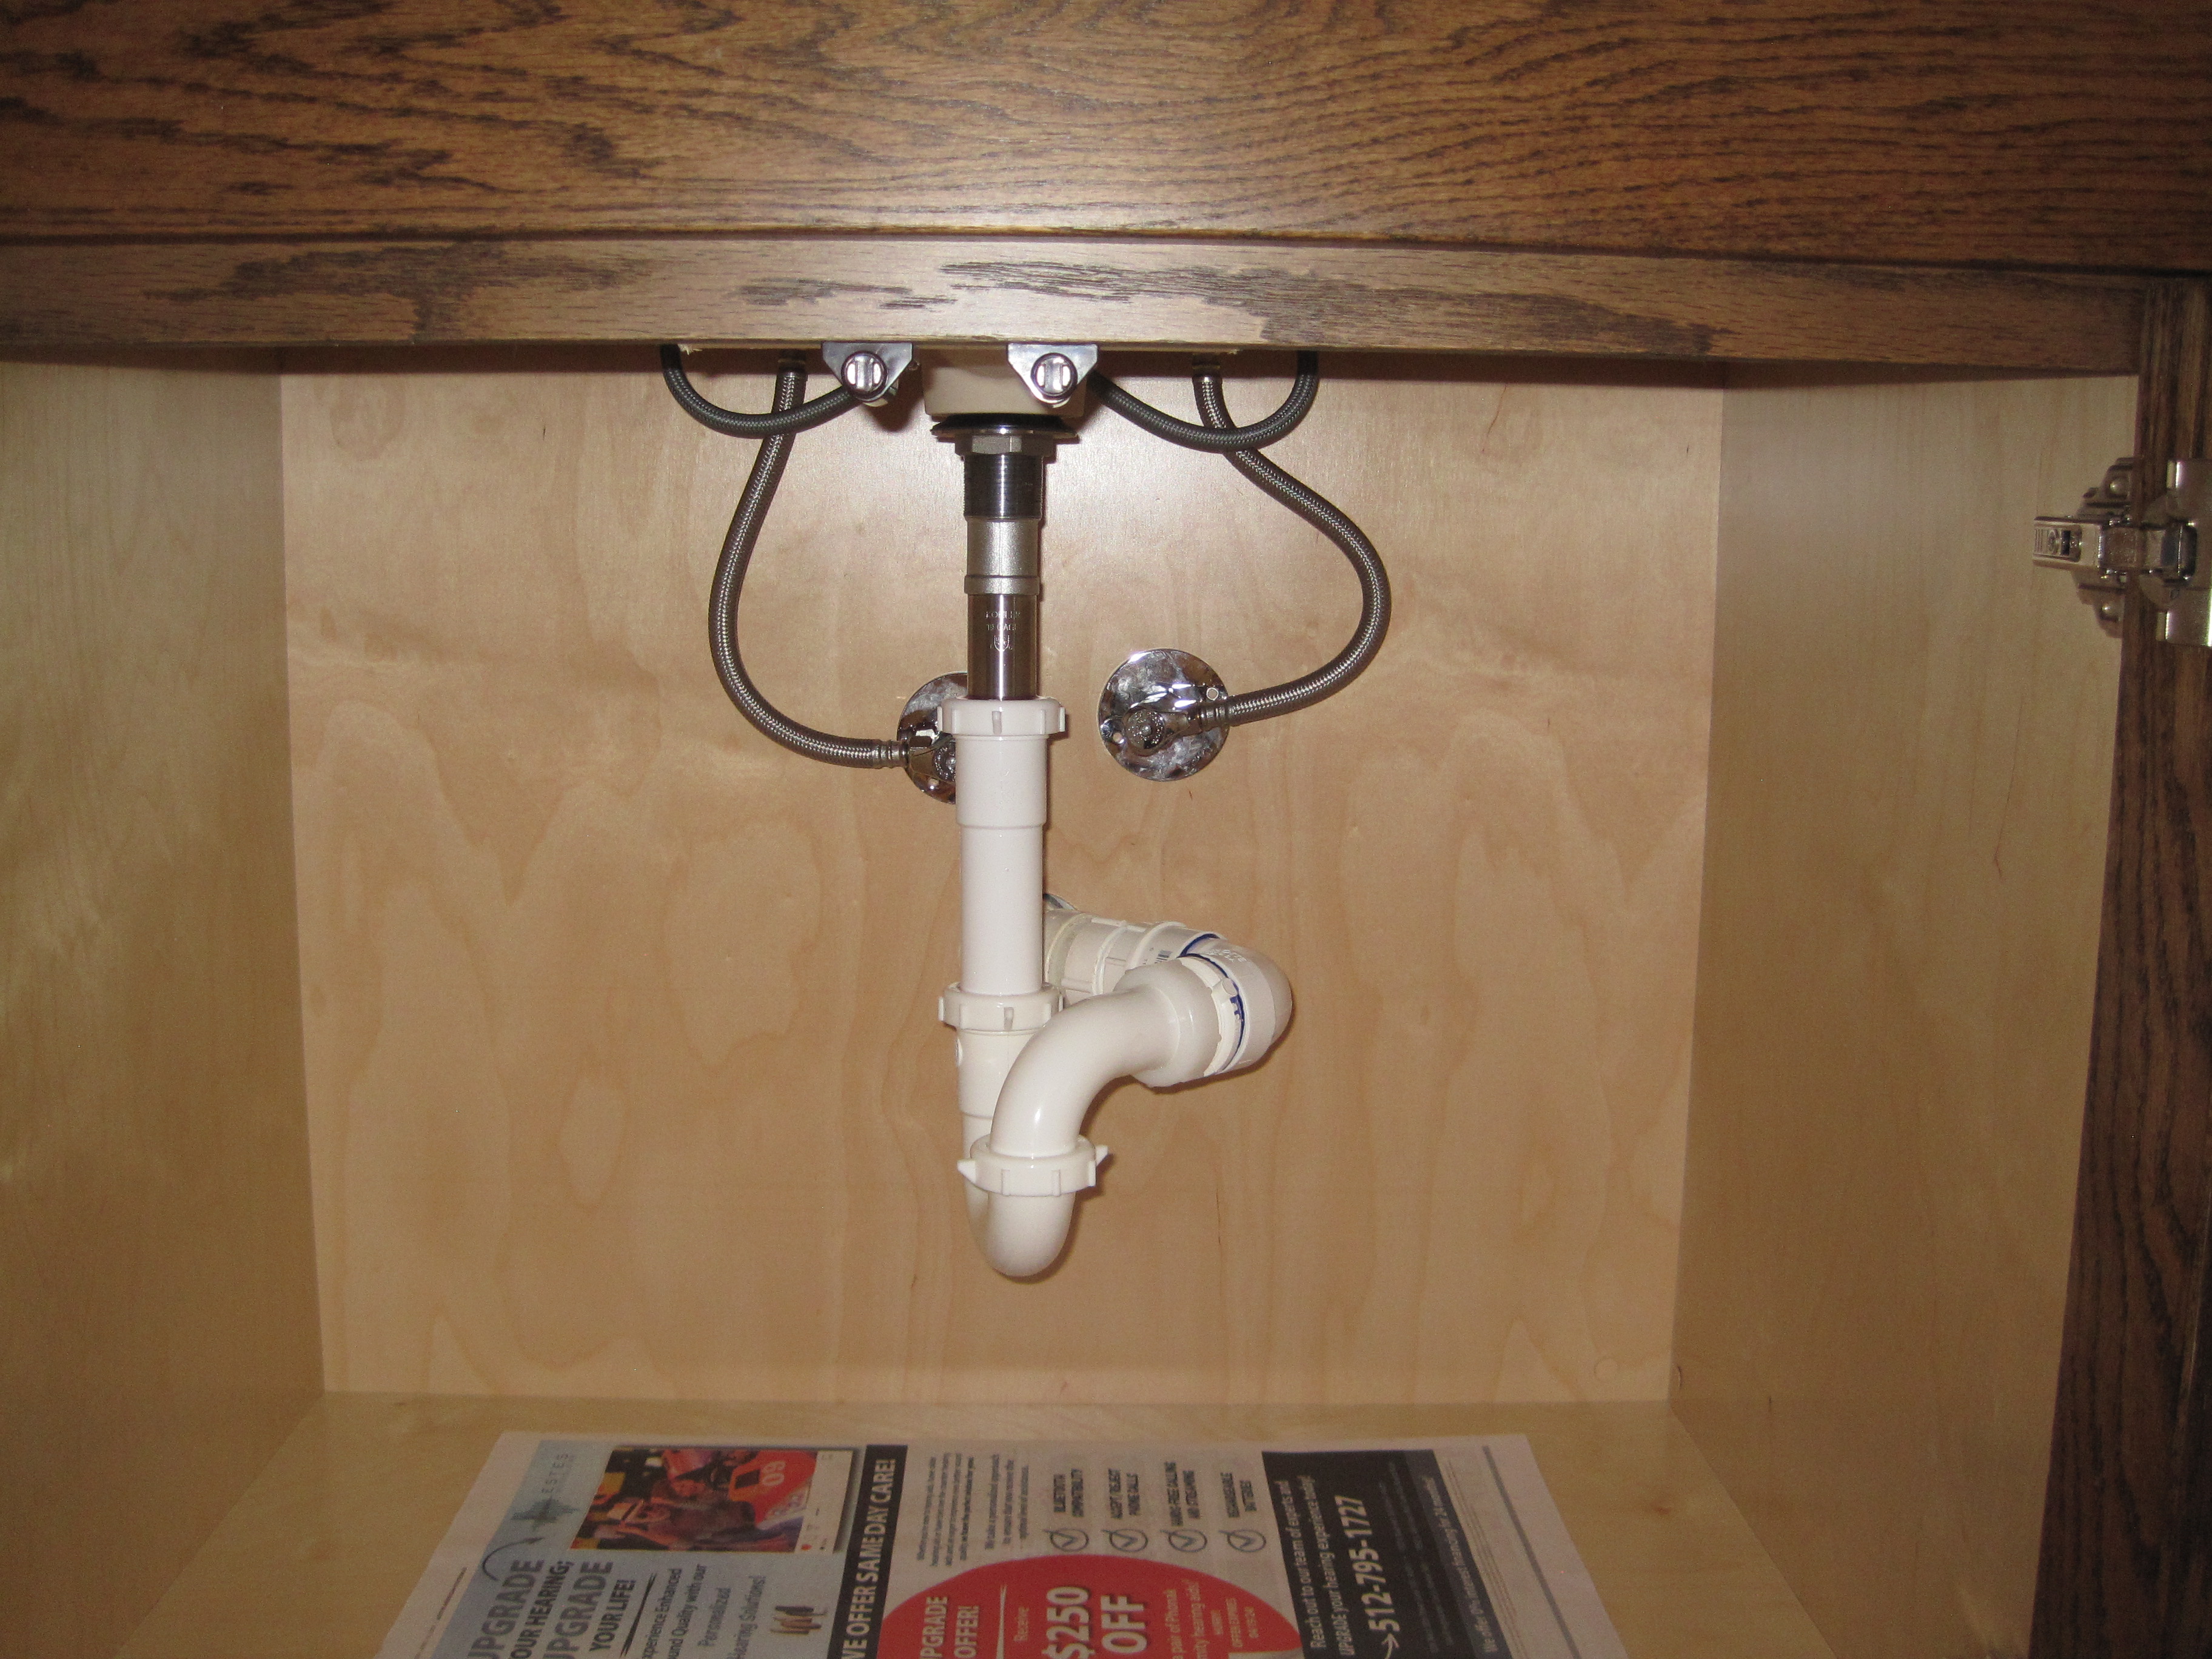
and under the sink, we need plumbing to drain the sink


Pretty much the same for the master bathroom.  The two sinks look the same, but the underneath is a little different.


just because of the location of where the water and drain connections are.

I put a piece of newspaper under each one to check for leaks.  Newsprint easily shows any drops of water.   Even if it is a small amount, and it evaporates before I see it, the paper will change texture where it has been wet.


We also installed towel racks.  The towel racks match the faucet style (Devonshire from Kohler).  We installed a short one (18 inches) by the sink and mirror.

and a longer one by the shower.  We had to remove a grab bar, but replaced it with a towel bar that can also work as a grab bar (if it does not have towels).


In the Master Bathroom, we put in a 24 inch towel rod between the two mirrors


and a long one and short one by the entrance to the shower.


Saturday, April 6, 2024

Mirrors, lights, and counter tops for bathrooms

 With the cabinets in place, the counter top people came out and measured where the counter tops will go.  Then they went off to work on the counter tops.  We expect them back in a couple of weeks.

In the mean time, the people can install the lights.  We choose lights from Lamps Plus, Possini Euro Exeter 36" Wide Nickel LED Modern Bathroom Light.  We need four of them -- one over each sink, plus one for the side of the center bathroom which will have just a cabinet, no sink.  These are $299.99 each, plus sales tax.


We also ordered 3 mirrors -- one for each sink.  For the master bathroom, we picked two Kohler 20" x 30" Single Door Reversible Hinge Frameless Mirrored Medicine Cabinet from the Verdera Collection, Model:K-99002-NA, for $296.13. 


For the central bathroom, Kohler 35" x 26" Double Door Reversible Hinge Frameless Mirrored Medicine Cabinet  Model:K-CB-CLC3526FS, just the one for $359.10.


(That is the shower curtain being reflected in the mirror.)

The doors and drawers arrived, and were put on the counters.  And the crew put down a 1x6 oak baseboard, stained to match the cabinets in both bathrooms, as needed.


Plus the shower glass was installed in the main bathroom.  The shower glass is one piece of 3/8 inch clear tempered Glass, 54 inches wide by 79.25 high.  I also got the "ShowerGuard" option.  Showerguard is supposed to make it need less cleaning, and what cleaning is needed is easier.

The glass (plus installation) was $1304.35.

And then we needed new toilets.  I have been happy with the ones we had, so we just got two new versions of the same thing, American Standard Champion Two-Piece 1.28 GPF Single Flush Elongated Chair Height Toilet with Slow-Close Seat in White.  I just drove over and got two from Home Depot, $454.60 for the both.


Then on Friday, the counter people showed up with the counters, and installed them.  That includes attaching the sinks to the counters and drilling the holes for the hot/cold water faucets (but not attaching anything to the plumbing).

The sinks are Kohler Ladena 23-1/4" Undercounter Lavatory sinks (in white) Model K-2215-0. $232.50 each, for 3 sinks ($697.50). The faucets will be Kohler, Devonshire Widespread Bathroom Faucet with Ultraglide Valve and Quick Mount Technology -- Model K- 394-4-BN.  $408.53 each, for 3 sets ($1225.59)


The simplest counter has no sinks.


But across the room, the counter has one sink.


And in the other, Master, bathroom, we have two sinks.


Update: 28 April 2025.  While putting towels in the cabinet in the master bathroom, the door came off!  The scres from the top hinge came loose.  Not sure if there were two screws or only one (never found two on the floor), but the one recovered screw was too short to do much.  It is a 1/2 inch screw (#8), so I replaced it (and the other missing one) with a 3/4 inch (#8) screw, which seems to be much  better.

A quick check of the cabinet doors in both bathrooms shows no other problem like this.


Tuesday, April 2, 2024

Fill in dirt for the Front Yard

 We put in a retaining wall in the front yard and brought in a lot of dirt to fill in where we dug out all the rock and stumps.  The dirt we brought in was perhaps not the best choice.  On the one hand it had a very high compost content which should help anything that is planted in it.  

On the other hand it had a very high compost content, so as the compost has decomposed, the soil level has dropped.  There are places with over 6 inches of subsidence. This seemed to particularly be a problem around the edges of the yard, next to the retaining wall.

To remedy this, I bought a bunch more dirt -- this time with a higher level of actual dirt -- and put that in the cracks that developed around the edges of the front yard.  Ten bags the first time ($26.70) and then back for another eight bags ($21.36).  Each bag is 40 pounds of Texas Native Enriched Topsoil, which it says is "local soil" and "compost".

This seemed to fill in around the edges pretty well.

And in particular in the area between the house and the stairs from the front sidewalk to the front yard.  Here we had to dig out the grasses that had been planted there, add the dirt and then replant the grass.


Friday, March 15, 2024

Cabinets for Bathroom Remodel Arrive

 The new cabinets for the two bathrooms being remodelled arrived today.  They were first unloaded into the garage.


And then moved into the appropriate bathroom.  The two tall cabinets were the most difficult to move since they were too tall to go thru the doors.  They temporarily removed the base from one of them.  The other we were able to get in by removing the light bulb and cover from the hall light fixture just outside the door to the bathroom.

Once they were in place, they were attached to each other and the walls.  The master bath has the simplest layout -- all along one wall.


The center bathroom has two walls with cabinets.  The left wall is not planned to have a sink (although all the connections are still in place below it.


The right wall will have the sink.


The doors and drawers are to be delivered at a later time, probably within two weeks.  But this allows the counters and sinks to be put in while we wait for the doors and drawers.