Linda found a wash-out near one of the rose bushes, and by turning on Zone 3, it was clear that this was a leak. Digging down at this spot, it appears that a T-connector had broken -- not sure why -- and would need to be replaced.
This required cutting out the T-connector and the attached tubing and splicing back in, using straight connectors, a new T-connector.
Flushing the system and trying it out, showed another leak at another location, on the other side of the rose bush, where Linda had planted a milk-weed plant. That was just in a straight part of the tubing.
And fixing that one, and then testing the zone, showed a third leak, a bit further from the other two.
This repair was just cutting the leaking part of the tubing, and then inserting a straight connector into both ends. It leaks a bit, but that's what drip irrigation is supposed to do, so we won't worry too much about it.
Friday, June 5, 2020
Thursday, June 4, 2020
A "door" in the fence
We occasionally need to get "behind" the fence, mainly to trim out stuff that starts growing there -- volunteer trees, and such. I need more than one slat to gain access. Two might do. Three certainly is enough. I was making use of the need to replace slats occasionally to also gain access, but thought I probably should just solve this problem on it's own.
So the idea is to take 3 adjacent slats and make them one large piece, so that it can be removed and replaced as one.
We first remove 3 slats.
We then re-attach, temporarily, the center slat with the new one.
Use the other two new slats to make sure that this center slat is positioned correctly.
We take one of the old slats that we removed, and don't need anymore, to cut out two short sections. Each slat is 6 inches wide, well actually 5 1/2 or so, and we want it long enough that it extends across the back of all 3 new slats, so about 15 inches long. We need two 15 inch long pieces -- one for the top and one for the bottom.
We position the two short sections so that they sit on the 2x4 cross rails for the fence, centered behind the one slat that is attached to the fence. Then put the other two new slats, one on each side and attach them to the short section, not the 2x4 cross rails.
Do the same at the bottom. Now the whole section of three slats is attached to the fence by just the one screw in the middle slat. You can use another screw at the bottom, but in our case, it slides behind the stone edging and in front of the lower railing, so it stays in place.
The three slats are all held together by the short pieces cut from the extra slat, and can be easily repositioned, because the short piece rests on the cross railings.
So the idea is to take 3 adjacent slats and make them one large piece, so that it can be removed and replaced as one.
We first remove 3 slats.
We then re-attach, temporarily, the center slat with the new one.
Use the other two new slats to make sure that this center slat is positioned correctly.
We take one of the old slats that we removed, and don't need anymore, to cut out two short sections. Each slat is 6 inches wide, well actually 5 1/2 or so, and we want it long enough that it extends across the back of all 3 new slats, so about 15 inches long. We need two 15 inch long pieces -- one for the top and one for the bottom.
We position the two short sections so that they sit on the 2x4 cross rails for the fence, centered behind the one slat that is attached to the fence. Then put the other two new slats, one on each side and attach them to the short section, not the 2x4 cross rails.
Do the same at the bottom. Now the whole section of three slats is attached to the fence by just the one screw in the middle slat. You can use another screw at the bottom, but in our case, it slides behind the stone edging and in front of the lower railing, so it stays in place.
The three slats are all held together by the short pieces cut from the extra slat, and can be easily repositioned, because the short piece rests on the cross railings.
Sunday, May 10, 2020
Solar Lights for the Back Yard Deck Stairs
The dog has started to act uncomfortable in coming up the stairs from the back yard to the deck at night. Linda suggests it is because of the contrast in lighting between the deck (with its two new bright LED light fixtures) and the yard.
So we purchased two LED lights to shine on the deck stairs. Since we have no power to this location, these are solar powered LED lights. The stairs face South and have no shade (at least until the Pecan tree gets much bigger), so this should work well.
We bought two Solar Step Lights from Amazon (JackyLED brand, $12.99).
and installed one on each side of the stairs.
The biggest problem was the installation. There are two screws which must be exactly the right distance apart (7.6 cm according to the instructions), but we traced the back of the light onto a piece of paper and then drilled holes using that as a template. However, despite drilling holes for the screws, the screws were made of such soft metal that they broken when screwing into the deck wood. Remember the deck is ipe (iron wood), and very hard. Luckily I had alternative screws that worked better.
The lights themselves seem to work really well -- very bright and last most of the night.
So we purchased two LED lights to shine on the deck stairs. Since we have no power to this location, these are solar powered LED lights. The stairs face South and have no shade (at least until the Pecan tree gets much bigger), so this should work well.
We bought two Solar Step Lights from Amazon (JackyLED brand, $12.99).
and installed one on each side of the stairs.
The biggest problem was the installation. There are two screws which must be exactly the right distance apart (7.6 cm according to the instructions), but we traced the back of the light onto a piece of paper and then drilled holes using that as a template. However, despite drilling holes for the screws, the screws were made of such soft metal that they broken when screwing into the deck wood. Remember the deck is ipe (iron wood), and very hard. Luckily I had alternative screws that worked better.
The lights themselves seem to work really well -- very bright and last most of the night.
Wednesday, May 6, 2020
Digging up the back half of the front yard, Part 1
With the tree gone, we have the opportunity to dig out the rock in the back half of the front yard. Last year, when we did the front half, we left the back half, so as not to disturb the tree. But it died anyway, so we can dig out the back half and have a deeper dirt level for the entire yard.
Without the tree, the front yard is really quite exposed. It gets bright hot Texas sun for much of the day. So we put up a sun shade to try to shelter the area we are working in.
The first problem would seem to be to locate the area that needs to be dug up. We started at where we thought the corner of where we had already dug up would be, but were way off, but moved over more towards the street and the barrier wall between us and the neighbors and found it.
Then we expanded that hole back towards where we had started, down to where it exposed the underlying rock layer.
And we then expanded the hole by digging back towards the house.
The white PVC pipe is just being used to try to define a straight line to delimit the edge of where we are digging.
Without the tree, the front yard is really quite exposed. It gets bright hot Texas sun for much of the day. So we put up a sun shade to try to shelter the area we are working in.
The first problem would seem to be to locate the area that needs to be dug up. We started at where we thought the corner of where we had already dug up would be, but were way off, but moved over more towards the street and the barrier wall between us and the neighbors and found it.
Then we expanded that hole back towards where we had started, down to where it exposed the underlying rock layer.
And we then expanded the hole by digging back towards the house.
The white PVC pipe is just being used to try to define a straight line to delimit the edge of where we are digging.
Thursday, April 2, 2020
Remove Spanish Oak Tree from Front Yard
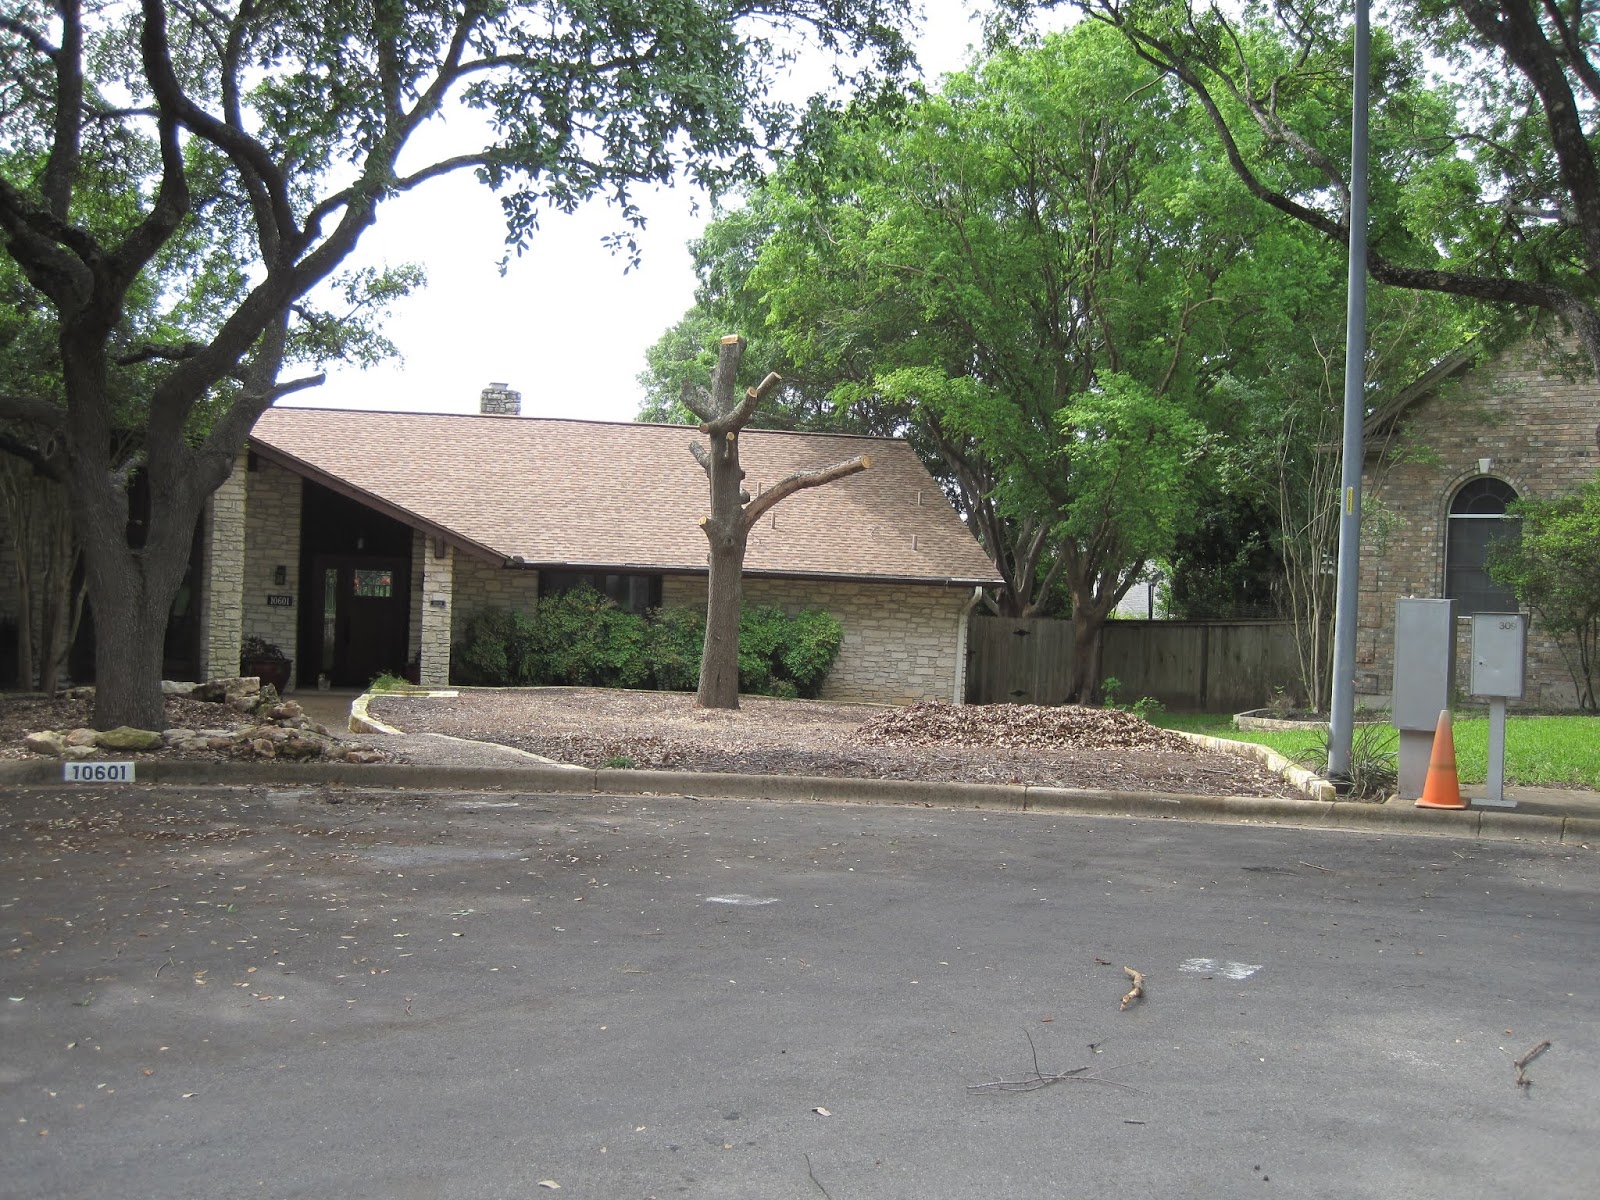
After all the work to try to make the big Spanish Oak in the front yard happy, it died. It appears that it died last Summer (2019) from too much heat and too little water. We thought it might just be dormant for the Winter, but come the Spring, there was no new growth -- no leaves. Occasionally branches would fall to the ground, and they were really brittle and dry.
So the decision was made to remove the tree. We started by removing all the lower limbs, which just confirmed our belief that the tree was dead.
Then we took the top off.
This produced a large stack of wood that we gave away on Craig's List, and an even larger stack of small branches and twigs which the City took away in Large Brush Pick-up.
but the yard is now clear of the tree and we can start digging, to remove the stump and any rock under the dirt.
So the decision was made to remove the tree. We started by removing all the lower limbs, which just confirmed our belief that the tree was dead.
Then we took the top off.
This produced a large stack of wood that we gave away on Craig's List, and an even larger stack of small branches and twigs which the City took away in Large Brush Pick-up.
The remaining part of the tree -- the trunk -- was 12 feet tall and 60 inches around (at the base). It took some 3 hours of work to remove the top branches and cut down the tree.
This leaves a stump
but the yard is now clear of the tree and we can start digging, to remove the stump and any rock under the dirt.
Sunday, March 22, 2020
New Thermostat
The existing thermostat (a Hunter model) seems to be failing.
Several times in the past week, it has forgotten the time and now it is forgetting the programmed temperature settings. Rather than wait for it to fail completely, it seems prudent to replace it now.
So we have bought a new Nest Learning Thermostat (Home Depot, $269.54) to replace it.
First we remove the old thermostat, exposing the 4 wires that it uses.
These four wires are a standard color mix (Red, Green, Yellow, White) and based upon how they were used before and an explanation on the Nest web site, we have:
R -- red -- the power wire for heating and cooling
W -- white -- controls the heating system
Y -- yellow -- controls the cooling system
G -- green -- controls the fan
These are still labeled from when the last thermostat was installed.
After patching and painting the area where the wires come out of the wall, we can install the Nest base.
and attach the wires to the Y1, G, W1, and RH tabs on the Nest base.
Then we attach the Nest thermostat on the base, and configure it. Since it is just down the hall from one of the Nest smoke detectors, the two work together to set up the network information.
and, in theory, that is all there is to it.
Several times in the past week, it has forgotten the time and now it is forgetting the programmed temperature settings. Rather than wait for it to fail completely, it seems prudent to replace it now.
So we have bought a new Nest Learning Thermostat (Home Depot, $269.54) to replace it.
First we remove the old thermostat, exposing the 4 wires that it uses.
These four wires are a standard color mix (Red, Green, Yellow, White) and based upon how they were used before and an explanation on the Nest web site, we have:
R -- red -- the power wire for heating and cooling
W -- white -- controls the heating system
Y -- yellow -- controls the cooling system
G -- green -- controls the fan
These are still labeled from when the last thermostat was installed.
After patching and painting the area where the wires come out of the wall, we can install the Nest base.
and attach the wires to the Y1, G, W1, and RH tabs on the Nest base.
Then we attach the Nest thermostat on the base, and configure it. Since it is just down the hall from one of the Nest smoke detectors, the two work together to set up the network information.
and, in theory, that is all there is to it.
This Nest thermostat was removed in November 2020, when we got a brand new Trane Heating and Cooling system, which requires a Trane thermostat (but of course).
Saturday, March 14, 2020
Front Yard River of Rocks
Years ago, I had finished out the River of Rocks to the front yard, running it up against the short bed wall separating the front beds from the lawn.
Then we needed to dig under this to move the gas line, and we removed the bed wall, added the dividing wall between our lawn and the neighbors, put in the retaining wall, dug up the front yard and brought in new dirt.
That left the small bed area by the front corner of the house in shambles.
We still had the rocks that were used before, but now the wall had moved further from the back yard, and the wall was much taller.
So we used dirt to create sort of a ramp up to the top of the new retaining wall, and repositioned the rocks on that.
And then we replanted the Monkey Grass that had been there (but was temporarily moved to another location) back between the rocks.
This should provide Monkey Grass between and along the River of Rocks and Turk's Cap in the area from the River of Rocks to the dividing wall, and maybe next to the house too. The Turk's Cap was planted there years ago, and all the digging seems not to have killed it; it keeps coming back from small parts of the roots left behind.
Then we needed to dig under this to move the gas line, and we removed the bed wall, added the dividing wall between our lawn and the neighbors, put in the retaining wall, dug up the front yard and brought in new dirt.
That left the small bed area by the front corner of the house in shambles.
We still had the rocks that were used before, but now the wall had moved further from the back yard, and the wall was much taller.
So we used dirt to create sort of a ramp up to the top of the new retaining wall, and repositioned the rocks on that.
And then we replanted the Monkey Grass that had been there (but was temporarily moved to another location) back between the rocks.
This should provide Monkey Grass between and along the River of Rocks and Turk's Cap in the area from the River of Rocks to the dividing wall, and maybe next to the house too. The Turk's Cap was planted there years ago, and all the digging seems not to have killed it; it keeps coming back from small parts of the roots left behind.
Sunday, March 8, 2020
Dirt for the Front Yard
The weather is improving, and it seems a good time to get dirt to finish the front yard work. We have the front yard area pretty well leveled, but it is a ways below the top of the rock walls that surround it -- 4 to 8 inches below.
We calculated that this is about 1600 square feet. For 6 inches deep, that would be about 32 cubic yards of dirt. We can only get 18 cubic yards in a delivery, so we order 18 cubic yards of dirt delivered. Getting Professional Mix from Whittlesey Landscape Supplies, with a $130 delivery fee, that comes to $1001.07.
We use some of this to top-dress the back yard, but the bulk of it goes into filling up the front yard, taking two days work.
Then it rains, so we wait a week and get another truck load of dirt delivered. 16 cubic yards this time (and with a senior citizens discount), comes to $829.60. Another two days work, and we have the front yard filled in.
We had a ring of mulch around the big Spanish Oak tree, and had to take that off, put dirt underneath and then put it back on.
We calculated that this is about 1600 square feet. For 6 inches deep, that would be about 32 cubic yards of dirt. We can only get 18 cubic yards in a delivery, so we order 18 cubic yards of dirt delivered. Getting Professional Mix from Whittlesey Landscape Supplies, with a $130 delivery fee, that comes to $1001.07.
We use some of this to top-dress the back yard, but the bulk of it goes into filling up the front yard, taking two days work.
Then it rains, so we wait a week and get another truck load of dirt delivered. 16 cubic yards this time (and with a senior citizens discount), comes to $829.60. Another two days work, and we have the front yard filled in.
We had a ring of mulch around the big Spanish Oak tree, and had to take that off, put dirt underneath and then put it back on.
Back Porch Light Fixture.
By this point, they are very old, corroded and don't put out a lot of light. It is very difficult to change the light bulbs. So the thinking was to replace them.
We bought a new fixture from Home Depot -- Milford 4-Light Brushed Nickel Flush Mount -- manufactured by Livex Lighting. This is an open design with four candelabra (E12) base lights. ($119.92).
Circuit breaker 30 controls these lights, so after turning that off, we removed the old fixture and installed the new one.This took about 30 minutes.
We put 4 "60 Watt" LED bulbs into the light fixture. Each of these takes about 4.5 watts, so that's only 18 watts total, well under the 40 watt maximum. But they put out a lot of light. In our case we got "Daylight" bulbs (5000 degrees Kelvin) putting out 500 Lumens. With 4 bulbs, we get 2000 Lumens, which is very bright.
Update: This worked well, so we bought another one of the same light fixture and installed it on the other end of the back porch.
For this one, we put in one Daylight bulb (since we still had one left over) and then put 3 soft-white lights (3000 degrees Kelvin) in the others.
Tuesday, February 4, 2020
Utility Room Smoke Detector
We have a smoke detector installed in the utility room, over the doorway to the kitchen.
When we were cleaning up after the washing machine leakage, and replacing the on/off shut-off valves for the washer (which involved using a torch to "sweat" the copper pipes), it became obvious that it wasn't working. Putting a new battery in it didn't help. But it was dated as being from 2001, so it probably needed to be replaced anyway.
We have been having good luck with the Nest smoke detector units in the rest of the house, and they also provide CO (carbon monoxide) detection, so we wanted to replace the previous one with a new Nest unit. Rather than having a battery operated unit, and having to keep the battery charged and replaced and all, we went for a wired unit, that uses the standard 120V house wiring. But of course, there was no power up here in this area, so we would need to run power for the new Nest unit.
And as long as we are running power to this area, we could install an outlet for the dustbuster, which currently has to run a wire down the wall and around a corner to the floor level outlet.
Power will be easiest to run from the attic. Luckily that part of the attic is not floored, so we just have to burrow down under the insulation.
Now it looks like we have an outlet already close to this area (Circuit 31), to provide power, but that outlet is switched (and we need raw power, not switched power), so we had to go a bit further afield to find an outlet that was not switched and tap into that to get power. While doing that, we replaced the outlet with a GFI outlet
And we then lucked out with putting in the new outlet boxes. The area over the desk in the kitchen is furred down, so the walls adjacent to that -- which are both of the walls we are putting outlet boxes in, have no back-side, and we have easy access to them (once you get below the insulation) .
So we cut the sheetrock and put in two new outlet boxes -- one for the new smoke detector, and the other for an outlet. We put in a GFI outlet, since it is "around" water (but of course, the outlet in the attic that provides power to this outlet is also a GFI, so this is especially overkill).
Then for the other outlet box, we attached the power connector for the Nest protect ($120, Home Depot).
And after getting it added to our network of Nest protect units, we should have a new, working, smoke detector and CO detector for the utility room.
Then we can close up the insulation in the attic.
and remove the old smoke detector, to finish all this up.
When we were cleaning up after the washing machine leakage, and replacing the on/off shut-off valves for the washer (which involved using a torch to "sweat" the copper pipes), it became obvious that it wasn't working. Putting a new battery in it didn't help. But it was dated as being from 2001, so it probably needed to be replaced anyway.
We have been having good luck with the Nest smoke detector units in the rest of the house, and they also provide CO (carbon monoxide) detection, so we wanted to replace the previous one with a new Nest unit. Rather than having a battery operated unit, and having to keep the battery charged and replaced and all, we went for a wired unit, that uses the standard 120V house wiring. But of course, there was no power up here in this area, so we would need to run power for the new Nest unit.
And as long as we are running power to this area, we could install an outlet for the dustbuster, which currently has to run a wire down the wall and around a corner to the floor level outlet.
Power will be easiest to run from the attic. Luckily that part of the attic is not floored, so we just have to burrow down under the insulation.
Now it looks like we have an outlet already close to this area (Circuit 31), to provide power, but that outlet is switched (and we need raw power, not switched power), so we had to go a bit further afield to find an outlet that was not switched and tap into that to get power. While doing that, we replaced the outlet with a GFI outlet
And we then lucked out with putting in the new outlet boxes. The area over the desk in the kitchen is furred down, so the walls adjacent to that -- which are both of the walls we are putting outlet boxes in, have no back-side, and we have easy access to them (once you get below the insulation) .
So we cut the sheetrock and put in two new outlet boxes -- one for the new smoke detector, and the other for an outlet. We put in a GFI outlet, since it is "around" water (but of course, the outlet in the attic that provides power to this outlet is also a GFI, so this is especially overkill).
Then for the other outlet box, we attached the power connector for the Nest protect ($120, Home Depot).
And after getting it added to our network of Nest protect units, we should have a new, working, smoke detector and CO detector for the utility room.
Then we can close up the insulation in the attic.
and remove the old smoke detector, to finish all this up.
Subscribe to:
Posts (Atom)