Thursday, September 29, 2022

Extending Zone 9 to another bed

 With the small front yard area between the sidewalk and the driveway dug up, and put back, we can turn to the irrigation system.  We have 3 areas to consider -- the top around the Oak tree (Fuzzy), the middle, and the bed by the garage and the front porch.  The bed is likely to be different from the other two areas, and we have another bed on the other side of the sidewalk, next to the house, so it seems natural to add the front bed to the already existing Zone 9, and then use Zone 11 for the other two areas.


The main difficulty is that the sidewalk is between the two beds.  To extend Zone 9, we will need to tunnel under the sidewalk to run a pipe to connect the two sections.

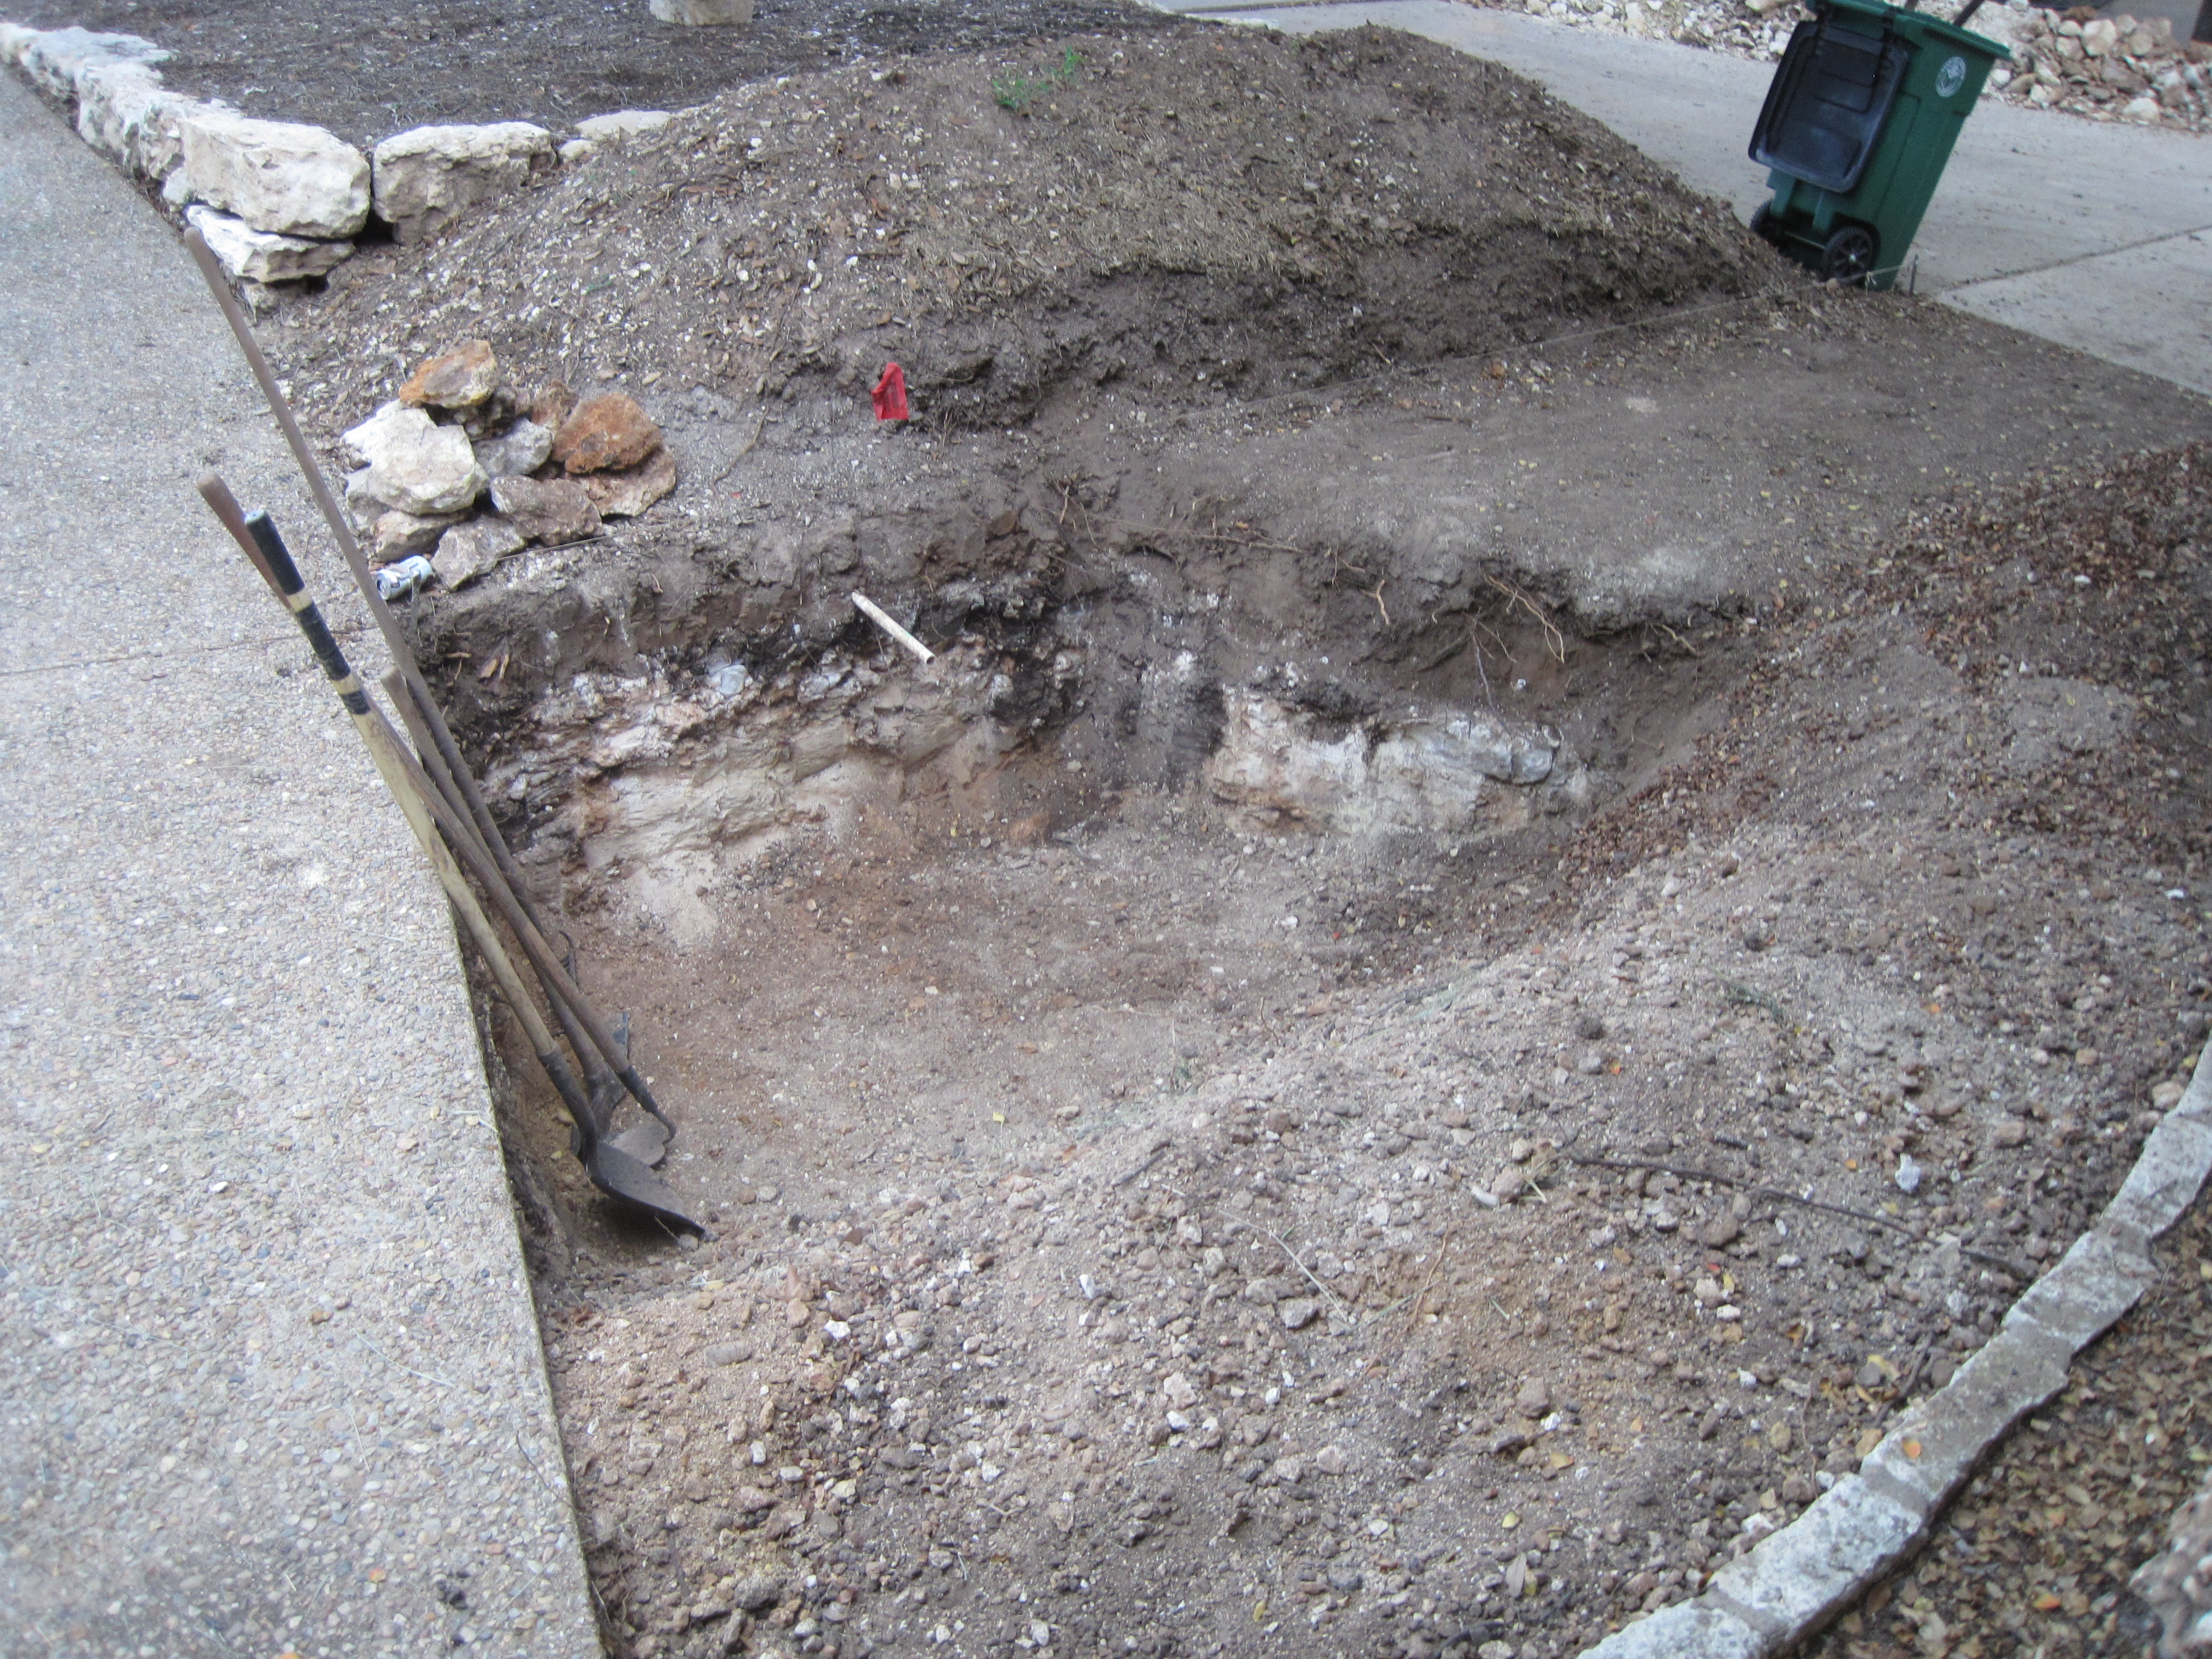
First we did down on the "new" side of the sidewalk, to expose the pipes that we want to connect to.


The pipe going towards the street is where the water used to come in, but now is just disconnected.  We remove it.


On the other side of the sidewalk, we have a sprinkler head (the end of Zone 9).


We dig down to find the actual pipes. We have to be careful here not to disturb the plants.


Getting under the sidewalk seems to be the main problem.  Our model of the sidewalk is about 4 to 6 inches of concrete, then some dirt they put down as a base for the concrete, and eventually, construction debris or the native mix of rock and dark clay soil.  But it appears we have only dirt, and digging thru that, we hit concrete.


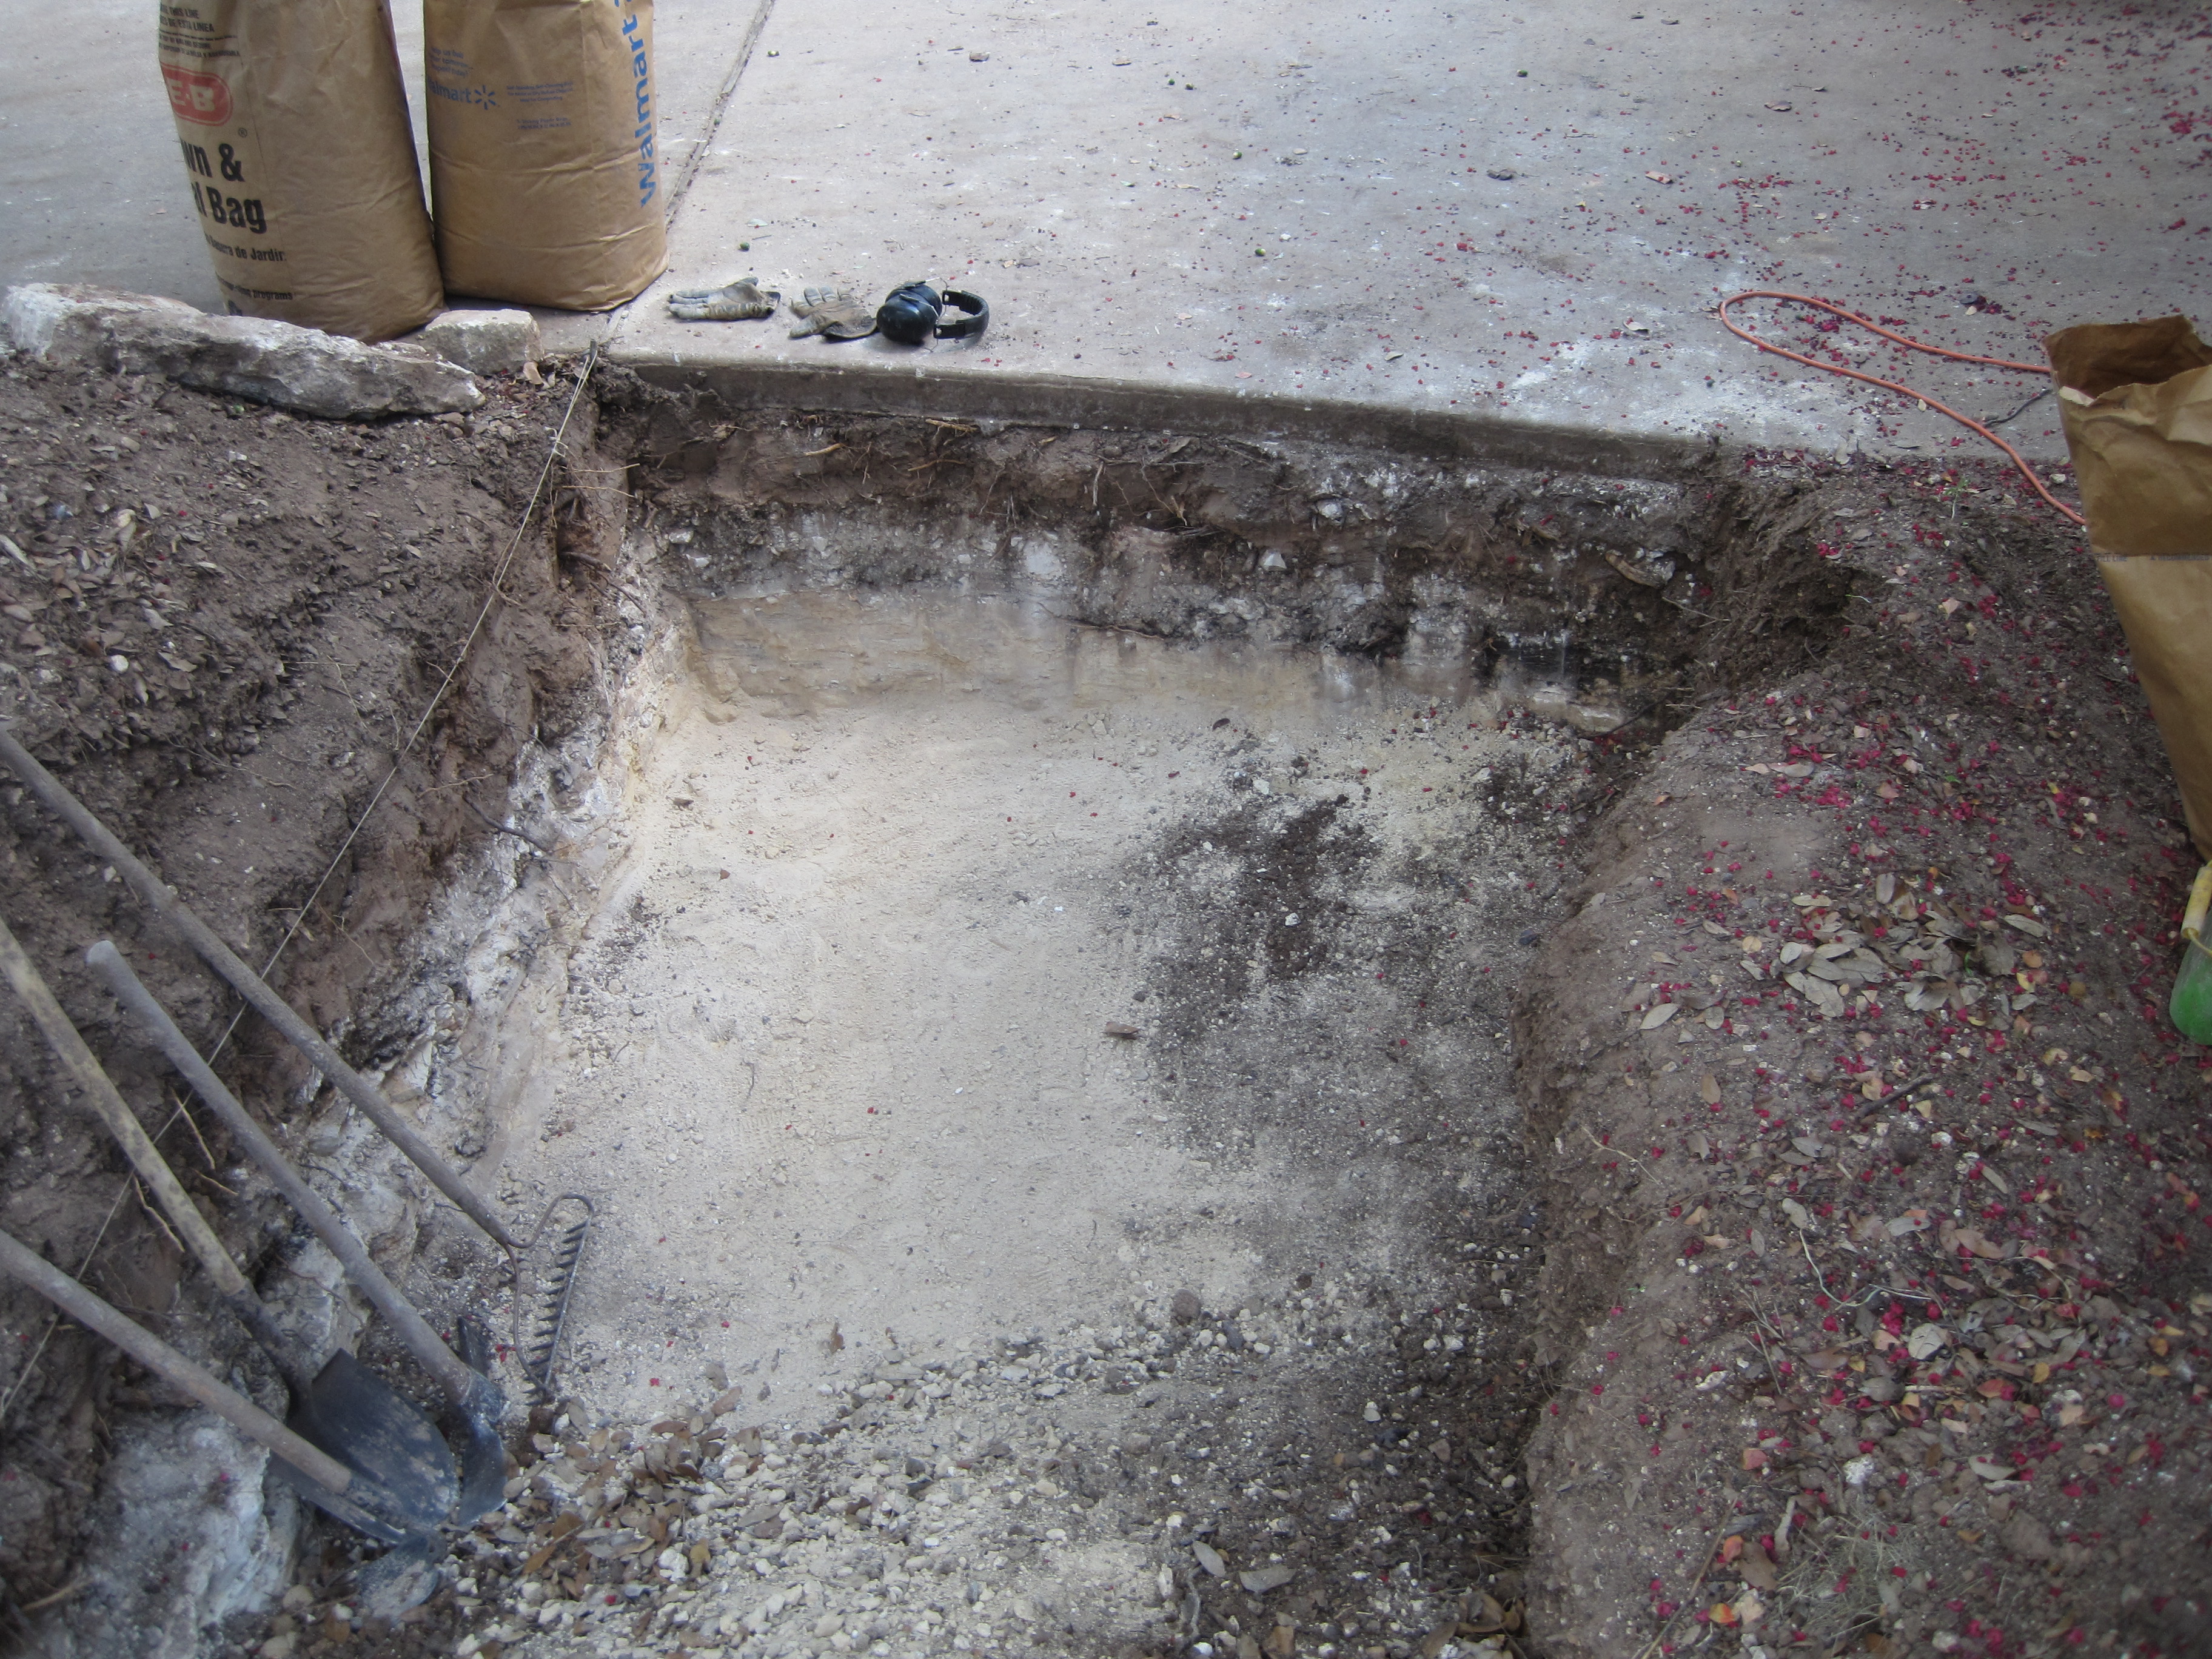
Our view of the sidewalk is obscured by the stone edging of the bed.  If we remove it, we can see the actual sidewalk structure itself.  So we do.


With the stone edging gone, we can see the sidewalk structure clearly.


Our basic model is correct, although it may be 8 to 10 inches of concrete.  Then a layer of light brown soil (sandy loam?) used as a base -- about 6 to 8 inches.  Then probably construction debris, but whatever, it's rocky.

So our best chance of getting thru is in the sandy loam.  But how to do that?  After much investigation of masonry core bits, earth augers, and such, we realized that the sandy loam is very soft and decided to just use a high pressure water stream.  We used our pressure washer and was able to get thru more than 2 feet of the dirt.  Then putting our six-foot pry bar in the hole and using a sledge hammer, we were able to break thru to the other side.

The pry bar was useful to dislodge the large rocks that had been buried in the sandy loam, and to enlarge the hole so that we could slide a 3-inch PVC pipe thru it.

Then we could run a 1/2-inch PVC pipe thru the 3-inch pipe and connect it to both the old Zone 9 line


and connect it to the 3 sprinkler heads in the bed next to the garage.


We had to cap off the end of the new section of pipe, in the bed close to the garage.


And, it turns out, there was a leak in Zone 19 that I had to fix too. Over by the gas meter, the line that ran from the heads near the house across, under the River of Rocks, to the wall at the neighbor's property line.  That line had come loose -- it looked as if when the new Zone 9 layout was done in August 2019 this line was near cemented in place; the pipes were just fitted together.


Once that leak was fixed, we could test Zone 9 and it worked as expected, allowing us to shovel the dirt back into the holes on both sides of the sidewalk.


Zone 9 now has about 19 heads on it, which seems like a lot.


Tuesday, September 27, 2022

Replace Fire Extinguisher

 We have a small home fire extinguisher in the utility room.

We first put one in here back in September 1986.

One of the properties of small children is they get into everything, and you have to watch them all the time.  In this case the grandchild was attracted to the fire extinguisher, and in the process of telling him to "leave it!", I noticed that it was undercharged.

I believe this happened once before, with my own kids -- they noticed it was undercharged and needed to be replaced.  

I  found a replacement at Lowes for $19.98.  First Alert  HOME1 Rechargeable 1-a:10-b:C Residential Fire Extinguisher. Model FE1A10GR195.

The first step is to remove the old fire extinguisher.

The new one is smaller than the old one, and has then a smaller bracket.  So we remove the old bracket.

Thankfully, the mounting holes are still in the same place, so we can just reuse them to mount the new bracket.

Then we put the new extinguisher on the new bracket

and we are ready for another 15 or 20 years.  Just to be sure, we check and see that it is properly charged.


Tuesday, September 6, 2022

Digging up the remainder of the Front Yard, Part 2

We started digging out this section of the yard back in May 2022, but I developed back problems from the work, so I didn't get back to it until late July.  But it stayed the same as when I left it (other than a bunch of leaves that fell in the hole).


The first thing to do was take out the little corners that had been left, next to the sidewalk and diagonal from that, to make it a simple rectangle.

Then apply the jack hammer to break up the rock shelft


and clear all of that rock out of the hole.


Then use the jack hammer to break up the next patch towards the sidewalk.  First break up the top dirt layer of about 8 inches, and scrape it down into the part of the trench that we have already dug.


Then take out the 8 to 9 inch layer of construction rubble that was buried when they built the house.


And finally break up and remove the foot or so of rock under all that, to get down to what we are using as the new bottom of the trench.


And repeat it once more to get all the way to the driveway.

This takes weeks, and produces lost of rock to be gotten rid of, plus some relatively rock free dirt, which we can mix with leaves and grass and re-use.  But we have to put it someplace while we work.  So we put it "behind" us, in the trench.

But now we want to continue digging, closer to the street, closer to the tree, Fuzzy. But not so close that we damage the roots of Fuzzy.

We notice there is a spacer in the sidewalk, about as close to Fuzzy as we would want to be.  And another spacer in the driveway a bit closer, but roughly again, as close as we would want to be to Fuzzy, to protect the roots.  So we run a string line from one spacer to the other, to define the totality of the space that we want to dig up here -- how close we can get to the tree.

 Note that we have to shave off some of the dirt that we pile up when we were first starting to excavate.

Then we can again start digging it up, first the dirt, then the construction rubble, then the solid rock, working our way from the sidewalk towards the driveway.  Rock gets put on the driveway to be gotten rid of later. Dirt gets mixed with leaves and grass and piled up in the trench where we first excavated, next to the bed in front of the house.

July turns to August, which turns to September.

We continued the trench across the front yard.


 First we remove the top dirt layer.  This exposes the construction rubble.


And then go thru that and the underlying rock, to get the next section dug out.


And finally repeat this same process on the last chunk of dirt, next to the driveway.


This gets us 30 inches down.


The top 8 to 10 inches are dirt.  The bottom 12 to 14 inches are solid bedrock.  The 6 to 10 inches between these two layers is construction rubble.

But having finished that, we can then put the dirt back in the hole.  A coupld of days shoveling from the piles on either side into the hole, and we get a relatively smooth patch of dirt back.


The bottom two-thirds of this patch have been excavated, and we expect the dirt for that part to settle over time.  After all, all the rock lined up along the other side of the driveway in this photo (and more) was excavated out of this lower section of the front lawn.